{
    "lazyNodes": false,
    "abFitnotesFlag": false,
    "abCrawlReviews": false,
    "productOptionsCookie": false,
    "orderDelayFlag": false,
    "skipSessionCookie": false,
    "covidMessage": false,
    "fullTitleCookie": false,
    "nrLoggerCookie": false,
    "checkoutReviewCookie": false,
    "productOptionSeqCookie": false,
    "maintenanceFlag": false,
    "bufferETACookie": false,
    "multiShippingDiscountFlag": false,
    "newFitmentFlag": false,
    "surveyOptInFlag": false,
    "crossSellFlag": false,
    "skuMappingFlag": false,
    "paySplitCookie": false,
    "callDisableFlag": false,
    "zipPaymentFlag": "u",
    "hassleFreeReturn": false,
    "lifetimeReplacement": false,
    "cpn_off": false
}BMW 525i Idle Control Valves
Shop Catalog
![]() WARNING: This product can expose you to chemicals including Lead, which is known to the State of California to cause cancer and birth defects or other reproductive harm. For more information go to www.P65Warnings.ca.gov.
WARNING: This product can expose you to chemicals including Lead, which is known to the State of California to cause cancer and birth defects or other reproductive harm. For more information go to www.P65Warnings.ca.gov.
![]() WARNING: This product can expose you to chemical which is known to the State of California to cause cancer and birth defects or other reproductive harm. For more information go to www.P65Warnings.ca.gov.
WARNING: This product can expose you to chemical which is known to the State of California to cause cancer and birth defects or other reproductive harm. For more information go to www.P65Warnings.ca.gov.
Customer Guides
BMW 525i Idle Control Valve: Easy Solutions to Common Issues
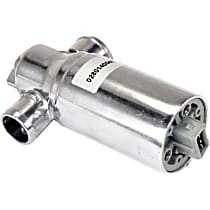
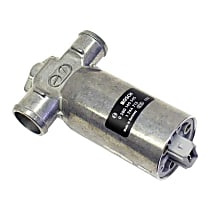
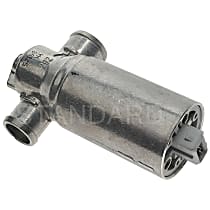
One of the most important parts installed in your BMW 525i is the idle control valve. Found near the throttle body, this part helps maintain your vehicle's RPM by monitoring and regulating airflow. However, despite its importance, it still gets damaged over time because of constant exposure to contaminants and varying temperatures in the engine block. Once it becomes damaged, various problems may arise that can affect your 525i's performance. Read on to know some of these idle control valve-related issues and what you need to do to solve them.
Stalling
One surefire sign that your idle control valve is about to go out is if your BMW 525i is stalling. Usually, because this part is clogged with carbon, airflow becomes restricted, therefore compromising the intake process. Once this happens, you must clean the valve immediately to prevent other problems. To do this, you need to use a carburetor cleaner that can be purchased from an auto parts store. Aside from this, you also need to prepare a 1/4-inch ratchet, a screwdriver, and a set of 1/4-inch sockets. However, make sure that the carburetor cleaner will not spread on your vehicle's electrical connections to avoid complications.
Rough idle
Another problem that you may encounter with a faulty BMW 525i idle control valve is rough idling. Characterized by unusual vibrations, this is normally brought about by a valve that is stuck open. As a solution, you should buy a new valve and replace the damaged one immediately. Fortunately, replacing an idle control valve is easy, and it can be done at home. Just make sure that you have a socket wrench and throttle body cleaner to accomplish the task.
Varying RPMs
If the RPMs of your BMW 525i are drastically changing especially when idling, then you'd better pop the hood and check the idle control valve for signs of damage. Although the standard number of RPMs varies per vehicle, it is still considered very low if it falls below 800 RPM. If this is the case, you must replace the valve immediately. You can also try cleaning it if it is clogged or too dirty.
Although it is oftentimes overlooked, the idle control valve is one of the most important parts of your vehicle. Without this part, the idling RPM of the engine will not be controlled, which may lead to various performance issues. For this reason, we listed some simple tips below on how you can keep your BMW 525i idle control valve in good condition:
Clean the idle control valve of your vehicle routinely.
One way to make your BMW 525i idle control valve last for a long time is by cleaning it routinely. By doing so, carbon residues in the valve will be removed, therefore preventing idling issues and other performance problems. However, when cleaning this part, make sure that you are using the right cleaning solutions such as a carburetor cleaner and a throttle body cleaner. Also, try not to spill your chosen cleaner because it may damage the electrical connections in the engine block.
Know the symptoms of a bad idle control valve.
Even though your idle control valve is designed to last for a long time, it can still get damaged due to engine contaminants and other factors. For this reason, you should know the symptoms of a bad idle control valve. You can learn about these from forums, DIY guides, and other kinds of automotive reading materials.
Check the idle control valve for signs of damage routinely.
Another way to guarantee the serviceability of your BMW 525i idle control valve is by inspecting it for signs of damage routinely. You can do this by visually examining the valve for carbon build up and cracks. Just make sure that you will refer to your owner's manual so you will know the location of this part. However, in case there are evident signs of damage, you can use a voltmeter to check if the valve is still functioning properly. All you need to do is connect one of the voltmeter's lead to the terminal of the valve, and get a reading between 0.00 and .05. If what you get falls outside this range, then you need to replace the valve immediately.


