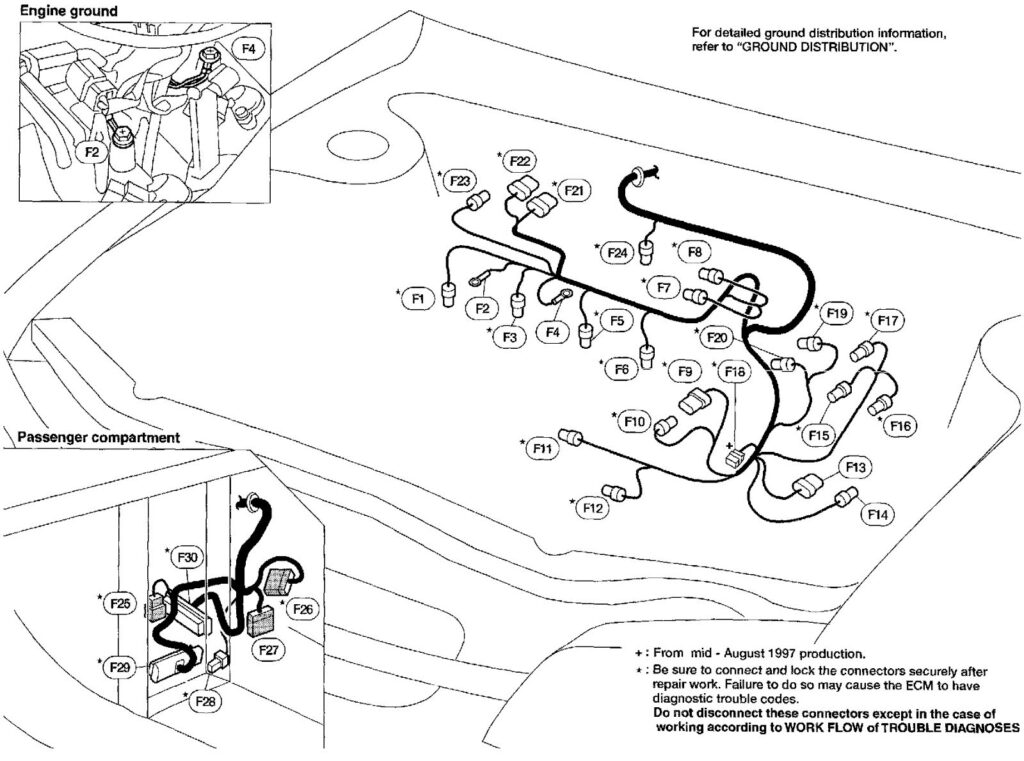
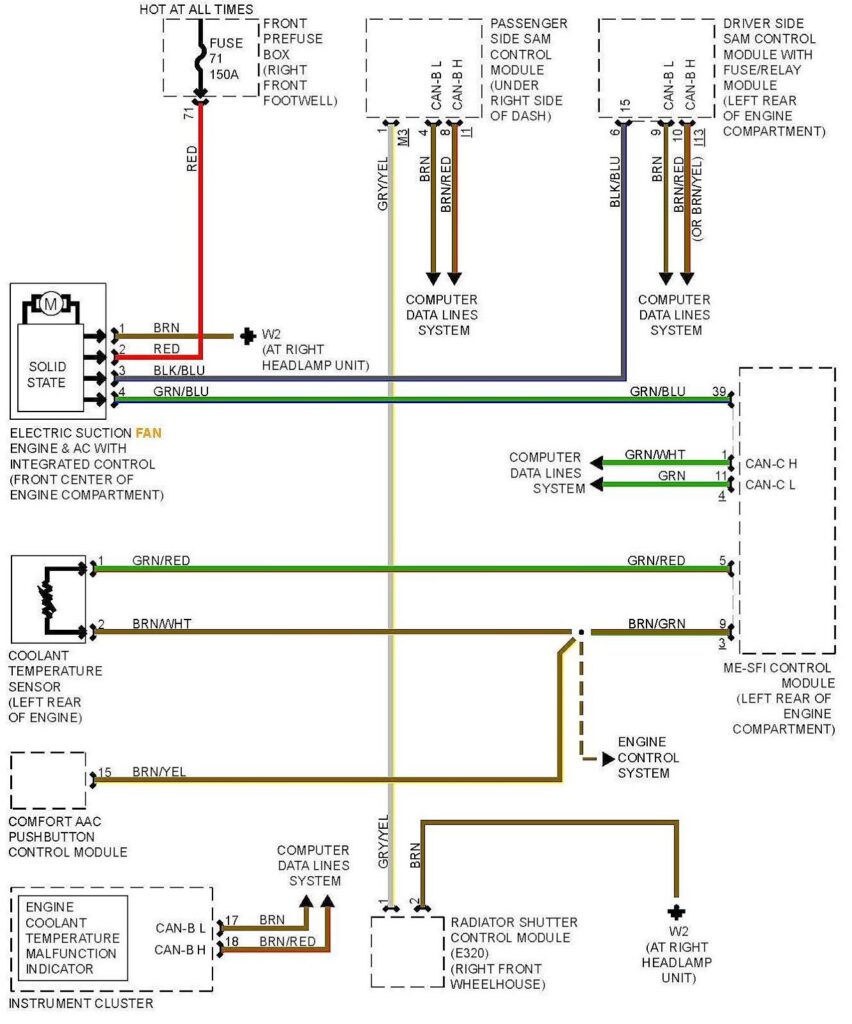
Like a map, wiring diagrams show how major electrical systems, circuits, wires, and devices are connected. Vehicle wiring diagrams can be found inside a vehicle owner’s manual or in manufacturer repair resources, which are typically available online. Reading wiring diagrams can be quite challenging since they involve many symbols, colors, and patterns that must be understood. However, understanding how to read car wiring diagrams is essential for diagnosing electrical issues effectively.
What Are Car Wiring Diagrams For?
In many cases, a malfunctioning part or device can be caused by faulty signals or insufficient power from a power source. Wiring diagrams show the devices and electronics wired to a power source and their layout. Using a wiring diagram to understand the faulty component’s circuit can help you inspect the device’s corresponding wiring, which can help you diagnose the issue.

For example, reading a wiring diagram can help you figure out why your headlights aren’t lighting up. The diagram can tell you how power flows from the battery to the headlight and the locations of any relays or switches in between the battery and the headlight. It’s likely that your headlights aren’t lighting up because one of these components isn’t functioning properly.
Usually, the power side of the diagram will be at the top and the ground side of the diagram will be at the bottom. The tutorial video from ASE-certified Master Automobile Technician Richard McCuistian below compares blower schematics from various different manufacturers to illustrate the difference from one automaker to the next. Newer schematics are different as well even on the various OEMS.

Car Wiring Diagram Symbols
Wiring diagrams use universal symbols to represent specific components, which allows experienced technicians to read them with ease. However, reading a diagram as a beginner DIY mechanic can be quite daunting.
If you’re new to reading wiring diagrams, these are some of the basic symbols that you should know how to read:
- Wires – Wiring diagrams fundamentally use lines to represent a wire connection.
- Switches – Switches are breaks in a line.
- Relays – Relays are boxes with a coil inside.
- Ground Connection – Ground connections are downward arrows that end in a series of horizontal lines.
- Battery – Batteries are a pair of alternating long and short vertical parallel lines. The short vertical line is the negative end and the long vertical line is the positive end.
- Capacitor – Capacitors are represented by two parallel vertical lines.
- Fuse – Fuses are short wavy lines in between two circular dots.
Note: These are only some common devices found in a common circuit. You should remember that symbols in each wiring diagram can vary. Luckily, each wiring diagram will have a legend in the corner that can help you identify which parts they correspond to.

Colors In a Wiring Diagram
The lines in a wiring diagram will also be color-coded. The wire colors can be incredibly helpful especially when wires are bundled up in a wiring harness. Each color typically corresponds to the purpose of the wire and the type of current it’s handling.
Many schematics have the color of each wire represented with appropriately colored lines, but most use letters and will have a legend to make sure you understand which letter means what color.
Some European cars use “L” for blue and some German cars use “SW” for black and “RO” for red. German cars typically use brown for ground wires, but Toyota may use black or even white with a black stripe for ground. Power wires will typically either be red or yellow, but they can be other colors. There is no universal rule when it comes to vehicle wiring.
Take note that these are only examples. Every vehicle can have a unique color code, so make sure to read through your owner’s manual.
Tips to Read Wiring Diagrams

Vehicle wiring diagrams can look incredibly complicated, as several devices, relays, and computers can be included. For example, something that would seem as simple as the courtesy light circuit on a 1993 Jeep Wrangler may be displayed over six or seven different pages and can be very difficult to trace. You should take note of the following tips to make understanding wiring diagrams easier.
Focus On a Specific System
There could be several pages worth of wiring diagrams in your vehicle. Luckily, wiring diagrams are typically separated into specific vehicle systems. For example, your vehicle’s headlights will have a dedicated wiring diagram that only includes devices that are relevant to the headlight’s function.
If you’re dealing with a specific vehicle system or component, you should focus on the wiring diagram for that specific system. You don’t need to read through the wiring diagrams of other systems.
For example, if you’re dealing with an ignition problem, focus on your car’s ignition diagram. Here’s a sample diagram to help you understand how the ignition system works on most vehicles:

With this, you’ll be able to better visualize the relationship between various ignition system components, such as the ignition switch and spark plugs.
Trace the Flow of Power
Reading a diagram is easy when you trace power flow from the vehicle’s battery. By doing this, you’ll be able to understand how the power is altered or controlled by devices such as switches, fuses, or relays.
Identifying these components helps you figure out which of them to inspect. If you want to inspect a specific component, the owner’s manual will likely have information on where it’s located. However, some manufacturers will have wiring diagrams that are easier to understand than others.

Identify Junctions or Splits in the Power Supply
Sometimes, there are instances where power splits into two separate components. Identifying where power splits is crucial. If a segment of wiring before a split is faulty, it can potentially cause problems for all the devices connected to the power source.
Identify Boxes and Subassemblies
Boxes on a wiring diagram typically mean that there’s a component or subassembly. These boxes essentially group circuit functions into one component. Identifying these components and subassemblies is important, since they can be the ones causing issues with your vehicle.
Cross-reference with Actual Wiring Under the Hood
Wiring diagrams aren’t meant to describe the location of all the wires and devices in a circuit. Instead, wiring diagrams just identify and label the involved components for you to learn what to check. Make sure to cross-reference anything you see in a diagram with what’s actually under the hood. Any deviation from what’s on the diagram may mean that the circuit may have been altered.
As long as you remember these tips, you should be able to read a wiring diagram and understand the circuits that allow a device to function. That said, we recommend consulting with an experienced technician or mechanic if you want to learn how to learn wiring diagrams and apply this knowledge when it comes to diagnosing issues.
Finding New Wiring Replacements for Your Vehicle
Being familiar with automotive wiring diagrams means being able to know what to do when wires corrode or become faulty. This involves inspecting them and replacing the ones that have become worn or defunct. It can be tricky to find a reliable place to get wires for your vehicle.
Fortunately, finding replacement wiring for the various components is easy with the help of CarParts.com.
To get started, simply use your mobile device or computer to visit our website. To check out the components that fit your ride, fill out the vehicle selector. Then, customize the catalog results to your needs using the search filters. This way, you can easily find wiring to use with your model.
On top of that, you won’t have to wait too long to receive your order, nor will you have to spend a lot of money. Our warehouses are strategically located all over the US, meaning you can receive your order within days. Our auto parts are available at competitive prices, meaning you won’t have to break the bank to get top-notch replacements.
Check out our catalog today!
Any information provided on this Website is for informational purposes only and is not intended to replace consultation with a professional mechanic. The accuracy and timeliness of the information may change from the time of publication.


