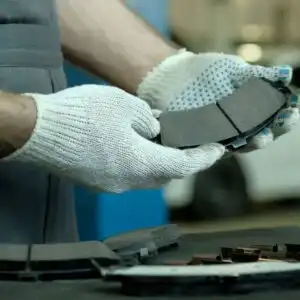
There are two types of braking systems, one of them being drum brakes. One of the most crucial parts of the system is the brake shoes.
What Are Brake Shoes?
Brake shoes are a pair of crescent-shaped steel components mounted to a heavy backing plate so that their friction linings are pressed against the inside of the brake drum by the wheel cylinder when you apply the brakes. They have a rough friction material glued or riveted on one side, so when you press the brake pedal, the shoes are forced outward and against the brake drum to slow the wheel down.
Drum brakes are a type of braking system with a brake lining that generates a stopping force once pressed against the drum. Unlike the disc brake system, which uses brake pads, drum brakes have brake shoes, while disc brake systems have brake pads.
Brake Shoes vs. Brake Pads
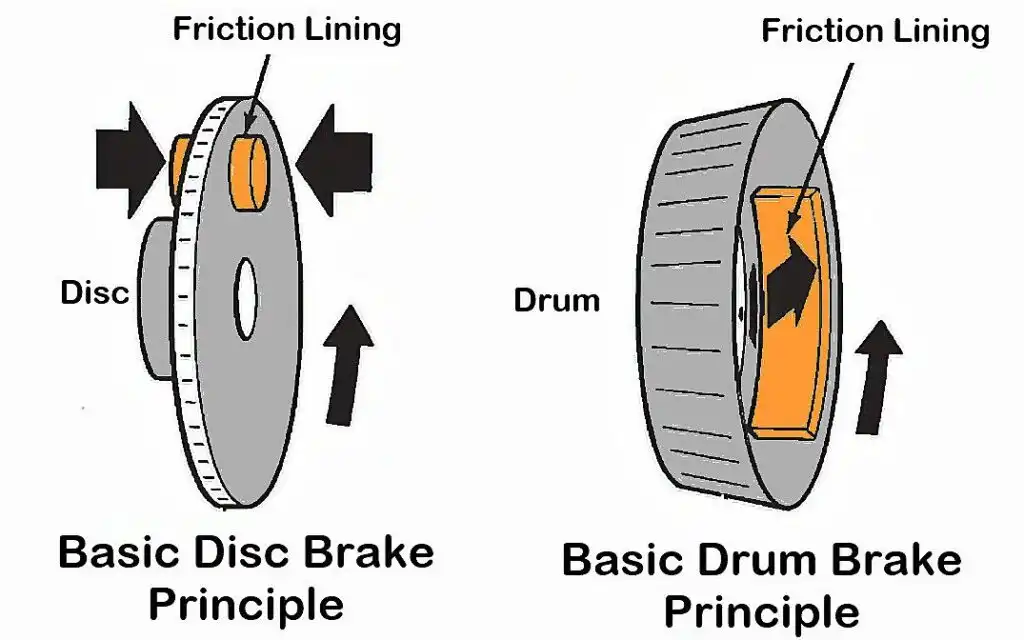
While brake shoes and brake pads are both braking system components, they’re typically used in different types of brakes.
Brake Pads
Brake pads are used in disc brakes, commonly found on the front wheels of modern cars.
Stepping on the brake pedal causes hydraulic pressure to force the brake caliper to squeeze the brake pads against the rotor, creating the friction needed to slow and stop the vehicle.
Brake Shoes
Brake shoes are used in drum brakes, which are less common on modern vehicles.
Compared to disc brakes, drum brakes use hydraulic pressure to push outward against the brake shoes, which press against the inner surface of the brake drum to create stopping friction.
How to Measure Brake Shoes by Visual Inspection
Getting the brake shoes’ measurement is crucial because once they wear, metal-to-metal contact occurs and can damage the drum. Measuring the shoe lets you check if it’s running thin and prevents damage to the drum.
Typically, you can measure brake shoes just by simple visual inspection. Here’s how:
Remove the Drum and Begin With a Visual Inspection
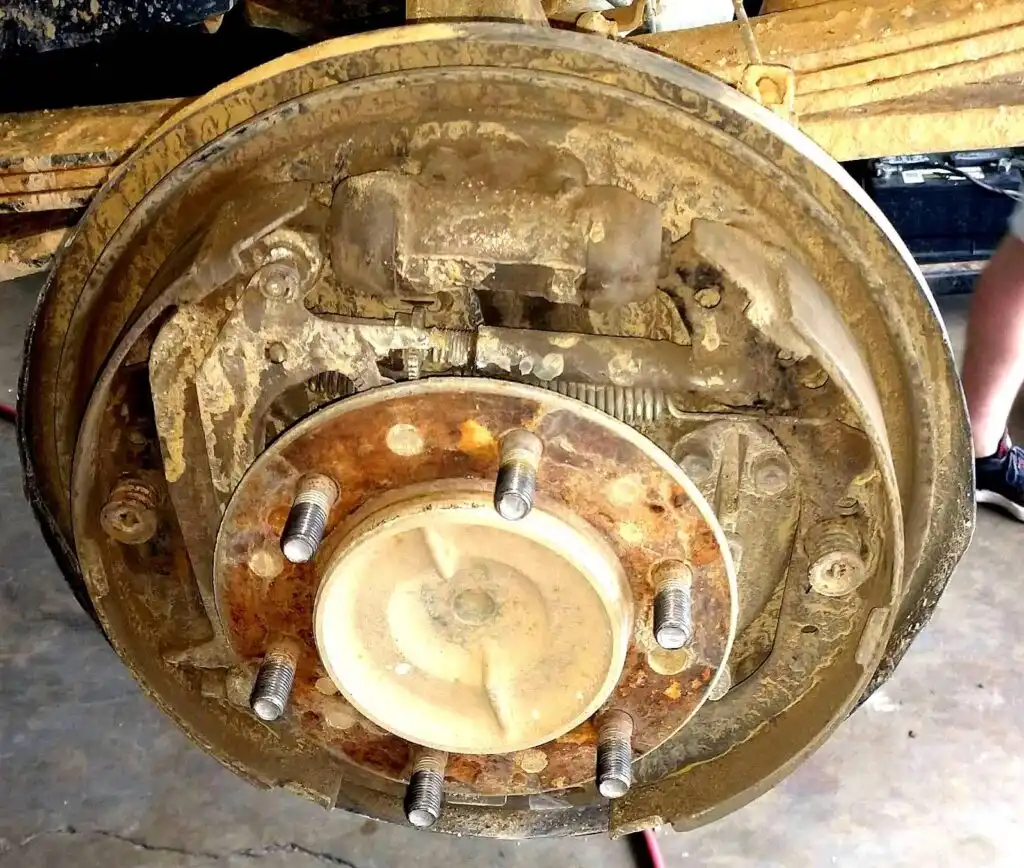
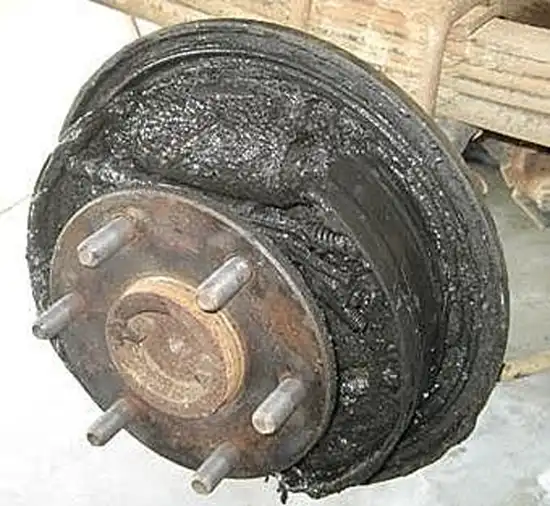
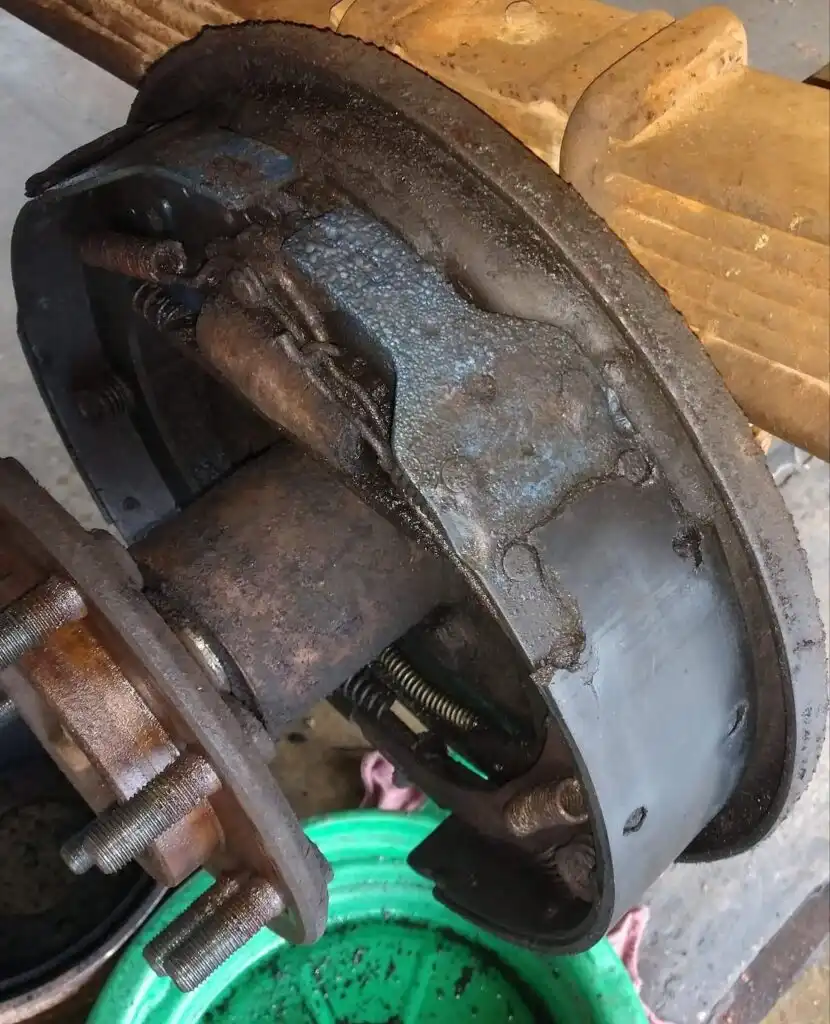
If the brakes are wet and greasy like the brakes in the second photo, the axle seal may be leaking or the wheel cylinder may have a bad leak. You’ll need to determine which.
Caution: But do not try this if you have no experience doing something like this whatsoever. This substance is toxic.
Either way, the source of the contamination needs to be dealt with, the mess needs to be cleaned off, and the brake shoes need to be replaced no matter how thick the lining may still be.
Other Ways to Measure Brake Shoes
Some people also use the following tools to measure brake shoes:
- Brake Shoe Gauge
- Vernier Caliper
- Depth Gauge
- Shop Ruler
- Flashlight
Here’s how:
Prepare the Brake Shoe
Remove the brake shoes (see steps below) and check for damage or wear. Use a brake cleaner or compressed air to remove any debris or contaminants.
Caution: When there is dry black brake dust, always remove it by washing with soapy water. Do not blow brake dust with air because brake dust contains asbestos, which can deal serious harm to your lungs.
Measure the Lining Thickness
Place the brake shoe gauge against the lining material, ensuring it’s perpendicular to the surface. Read the measurement from the scale on the gauge. Repeat these steps for each shoe.
Measure the Width
Use the vernier caliper to measure the width by placing it against the shoe’s outer edges until it fits. Read the measurement from the scale and repeat for each shoe.
Measure the Length
Follow the same steps above, but this time, measure the length of each shoe.
Check for Groove Depth
Use the depth gauge to measure the depth of any grooves or indentations on the brake shoe lining by placing the gauge inside the groove. Read the measurement from the gauge and record it.
Check the Brake Shoes
Look at the condition of the brake shoes, the wheel cylinder, and the brake hardware again to see if there are issues you need to address.
Symptoms of a Bad Brake Shoe
Some symptoms of a bad brake shoe include squealing noises, difficulty braking, vibrations when braking, a loose brake pedal, and an illuminated brake light warning sign.
Squealing or Grinding Noises
When you start braking and hear a squealing or grinding noise, it might be due to a worn brake shoe scraping against the inside part of the drum brake. Sometimes brake parts will come loose and squeal against the brake drum, and sometimes accumulated brake dust will cause squealing noises even though the brakes aren’t worn out.
Difficulty Braking
The brake shoes are responsible for stopping the vehicle, so once they are worn, it’ll get more difficult to brake. You might also notice a significant reduction in stopping power.
Vibrations or Pulsation When Braking
Usually brake pulsation is caused by the disc brakes, but drum brakes can also cause pulsation. Drive the vehicle in a parking lot and gently apply the park brake to stop the vehicle to see if the drum brakes are the cause of pulsation.
Loose Brake Pedal
Another indication of a worn brake is a spongy or soft brake pedal. This occurs because drum brakes have a self-adjuster to maintain the appropriate distance between them and the brake shoes. Once the shoes are worn, the distance increases, resulting in a spongy feeling.
Pro Tip:
Illuminated Brake Light Warning Sign
An illuminated brake light warning indicates an issue with the braking system, meaning there are different possible reasons why it’s lit. One of them is a worn brake shoe because it affects performance.
Once you notice the warning light is on, it’s best to have a mechanic look at the braking system to diagnose the reason instead of trying to replace the shoe immediately. Doing so ensures you don’t waste time and money fixing a component that might have been working properly.
How to Change Brake Shoes
Changing the brake shoes can be broken down into three steps: removing the brake drums, removing the brake shoes, and changing them. To do all three, you’ll need the following tools and equipment:
- Jack
- Jack stands
- Lug wrench
- Rust remover (optional)
- Pliers
- Screwdriver
- Brake Spring Tools

Brake Drum Removal
You’ll first have to remove the brake drums to access and remove the brake shoes. To do so, follow the steps below:
- Step 1: Park the vehicle and jack it up to remove the wheels.
- Step 2: Remove the drum. This may be difficult if the shoes have worn into the drums to the point that they have to be adjusted inward to release the drum.
Brake Shoe Removal
This video shows how to use the brake spring tools, so it’s important:
There are two basic types of drum brakes on vehicles. One is leading trailing and the other is duo servo. Brake shoe removal procedures differ slightly from one to the other.
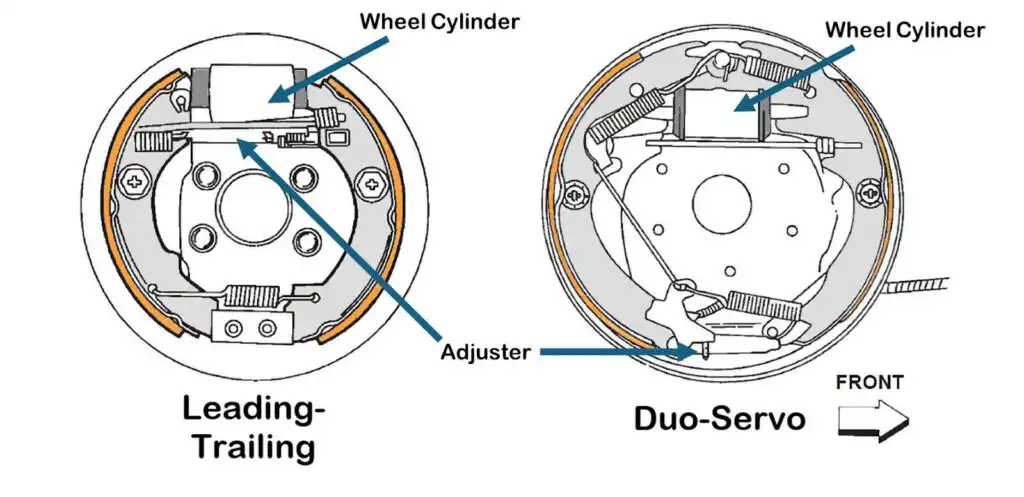
To remove the brake shoes, follow the steps below:
- Step 1: Use the brake spring tools to remove the brake shoe springs that retain the shoes.
- Step 2: Disconnect the parking brake cable from the lever that is attached to the rear shoe or disconnect the lever from the shoe. Remove the fulcrum bar and the adjuster.
- Step 3: With the springs and the lever disconnected, the brake shoes will be loose and will fall off if you don’t catch them.
Brake Shoe Replacement
Lastly, changing the brake shoe requires you to do the following steps:
- Step 1: Check if the old and new brake shoes are identical to ensure fit.
- Step 2: Starting with the springs, remove the components (see video link above).
- Step 3: Reset the parking brake adjuster by screwing it all the way in. If it is stiff, take it apart and lubricate the thread and cap and reassemble it, screwing it all the way in but don’t tighten it. One side will have left hand thread, so be aware of that.
- Step 4: Disconnect the parking brake lever from the rear shoe. Sometimes there will be a bendable horseshoe clip that must be removed and sometimes there will be an e-clip.
- Step 5: Connect the park brake lever to the rear shoe and mount the rear shoe with the spring and washer retainer to hold it in place. Make sure the shoe is engaged with the wheel cylinder properly.
- Step 6: Mount the front shoe the same way. Install the springs, the fulcrum bar that goes between the shoes, and the adjuster.
- Step 7: Finger-adjust until the shoes are very near the drum by removing and reinstalling the drum while making adjustments.
- Step 8: After installing the drum, you’ll need to use a brake spoon or screwdriver to gently adjust the shoes outward in small increments to get them very near the drum but not so they’re preventing the drum from turning.
How Long Do Brake Shoes Last?
The lifespan of brake shoes depends on where and how you drive the vehicle. Generally, they can last up to 80,000 miles or more, but that could be cut down to 30,000 to 35,000 if you’re driving somewhere urban.
Where to Get New Brake Shoes for Your Vehicle
A worn shoe should be a cause of concern, as you may have trouble slowing your vehicle to a halt. Thankfully, CarParts.com has an array of high-quality brake shoes for you to choose from.
We can guarantee the quality of the brake shoes we offer since we source them from the most trusted manufacturers in the industry. This ensures you get replacement brake shoes that fit like the stock part and are built to last. Not only that, but we offer them at varying price points. This means you have options when choosing which brake shoe fits your budget.
Shop now to get the best deals on replacement brake shoes!
Any information provided on this Website is for informational purposes only and is not intended to replace consultation with a professional mechanic. The accuracy and timeliness of the information may change from the time of publication.


