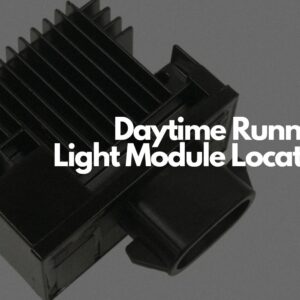
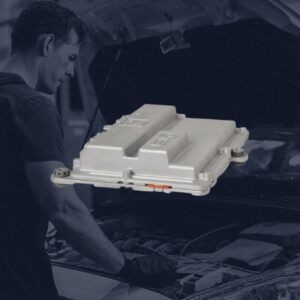
The light control module (LCM) controls the different lighting systems in a car, including the headlight, tail light, turn signals, fog lights, and horns. It does so by using a central microprocessor-based device that manages and controls the lighting systems.
What Does the Lighting Control Module Do?
Besides centralized control, other functions of the LCM include automatic adjustments, improved energy efficiency, and fault detection.

For just one example, on a 2000 Crown Victoria, the lighting control module (see photo) is described this way:
The LCM is a microprocessor- based module that controls several vehicle subsystems. It responds to electrical input signals from various switches, sensors, and external modules.
The LCM is a microprocessor- based module that controls several vehicle subsystems. It responds to electrical input signals from various switches, sensors, and external modules.
– Richard McCuistian, ASE Certified Master Automobile Technician
Crown Victoria LCM subsystem functions include:
- Headlamps with autolamps
- Turn signal lamps/hazard flasher lamps
- Cornering lamps
- Parking lamps
- Courtesy lamps
- Demand lamps
- Battery saver
- Backlighting
- Interfacing with the driver door module
Automatic Adjustments
The LCM’s algorithms can automatically adjust the lights based on external conditions. For example, some LCMs might brighten the headlights if the road ahead is darker than anticipated. This makes driving safer because you won’t need to manually adjust the light.
The caveat is that not all LCMs work the same way or have the same functions.
Improved Energy Efficiency
In the same vein as automatic adjustments, the LCM can dim or turn off the lights if necessary to reduce unnecessary energy consumption.
You might also see a decrease in fuel consumption because turning on the lights results in more load on the dynamo, the component that converts energy from engine fuel into electrical energy.
Fault Detection
LCMs on modern cars can also detect faults in the lighting system. For example, the LCM could alert you if a bulb is burnt out by showing “left/right side light out” bulb lights on your dashboard.
Knowing whether your car bulbs are working properly is crucial, especially on difficult terrains and low-visibility scenarios. If the LCM detects that one is faulty, you can change it before going on a trip, ensuring you get optimal visibility when you drive after dark.
Signs of a Failing Light Control Module
Some signs of a failing LCM include the following:
- The headlight, taillights, and brake lights aren’t working.
- The turn signals and emergency hazard lights don’t blink or are blinking too quickly.
- The dashboard is not illuminating.
These are all light-related issues. As such, they don’t always correlate to a malfunctioning light control module. For one, the bulbs of the listed lights might have simply gone out or the dashboard itself is damaged.
However, it’s still worth listing the LCM as the potential cause of problems. In some cases, resetting or replacing the LCM can resolve.
How to Reset the Light Control Module
There are two ways you can reset the LCM: by manually resetting it or using an OBD scanner. Before doing so, check your owner’s manual for specific instructions, as resetting the LCM may vary depending on the car model.
You must also ensure the battery is fully charged for a smoother reset process. Lastly, disconnect any aftermarket lighting accessories to avoid interference during the process.
Manually Resetting the Light Control Module
To manually reset the LCM, follow the steps below:
- Step 1: Open the hood of your car and disconnect the negative battery cable to cut off the LCM’s power supply. Use a wench/plier to loosen the nut/bolt that secures the negative cable (black cable). Remove the cable and set it aside.
- Step 2: Wait at least 15 minutes for the LCM to reset and clear temporary settings or fault codes.
- Step 3: Afterward, reconnect the negative battery cable by placing it back in the terminal. Use the wrench/pliers to secure the cable by tightening the nut/bolt.
- Step 4: Test all the lights, especially the malfunctioning ones.
If the lights are still not working, consult a professional, as they’ll have more knowledge and experience dealing with LCM issues.
Using an OBD Scanner to Reset the Light Control Module
If you have an OBD scanner on hand, you can use it to reset different modules, including the LCM. To do so, follow the steps below:
- Step 1: Plug the scanner into the port, usually located under the dashboard on the driver’s side. Turn on the ignition, but don’t start the engine. Wait for the scanner to establish communication with the vehicle’s systems.
- Step 2: Navigate the scanner’s menu and select the one related to the LCM. This differs depending on the scanner, but it should indicate “lighting.”
- Step 3: Press the reset or initialize option on your scanner and follow the instructions on the screen. The resetting process could take a few minutes.
- Step 4: After the process, look at the screen for any fault codes. If there are none, it means the reset was complete. However, if a code is present, it may be best to take your vehicle to an auto shop for professional assistance.
How to Replace the Light Control Module
If resetting the LCM doesn’t solve the issues, it might be better to replace the old module. To do so, follow the steps below:
- Step 1: Turn off the car and remove the keys from the ignition before disconnecting the negative terminal of the car battery.
- Step 2: Locate the LCM, which is usually underneath the steering wheel. If not, you can always check your owner’s manual for its location.
- Step 3: Remove the old module by removing panels or covers, disconnecting the wiring harness connected to the module, and unbolting it by removing screws.
- Step 4: Place the new module in the same position as the old one and reconnect the wires you removed. Afterward, bolt or screw it into place.
- Step 5: Reconnect the battery and turn the car on to see if the lights function.
- Step 6: If everything works fine, reassemble the panels or covers you removed.
Where to Get a Replacement Light Control Module
As mentioned, replacing the LCM is a viable option if resetting it doesn’t fix the issue. If you’re in the market for a module that works like your original module but won’t break the bank, head over to CarParts.com.
With only a few clicks, you can find the light control module for your ride on our website. To start, search for the part you need, then fill out the vehicle selector to narrow down the results to the ones that fit your ride. Use the filters to refine the selection and view the lighting control modules that match your preferences.
Shop now and get the lighting control module you need!
Any information provided on this Website is for informational purposes only and is not intended to replace consultation with a professional mechanic. The accuracy and timeliness of the information may change from the time of publication.


