Wire Connectors and Crimp Tips
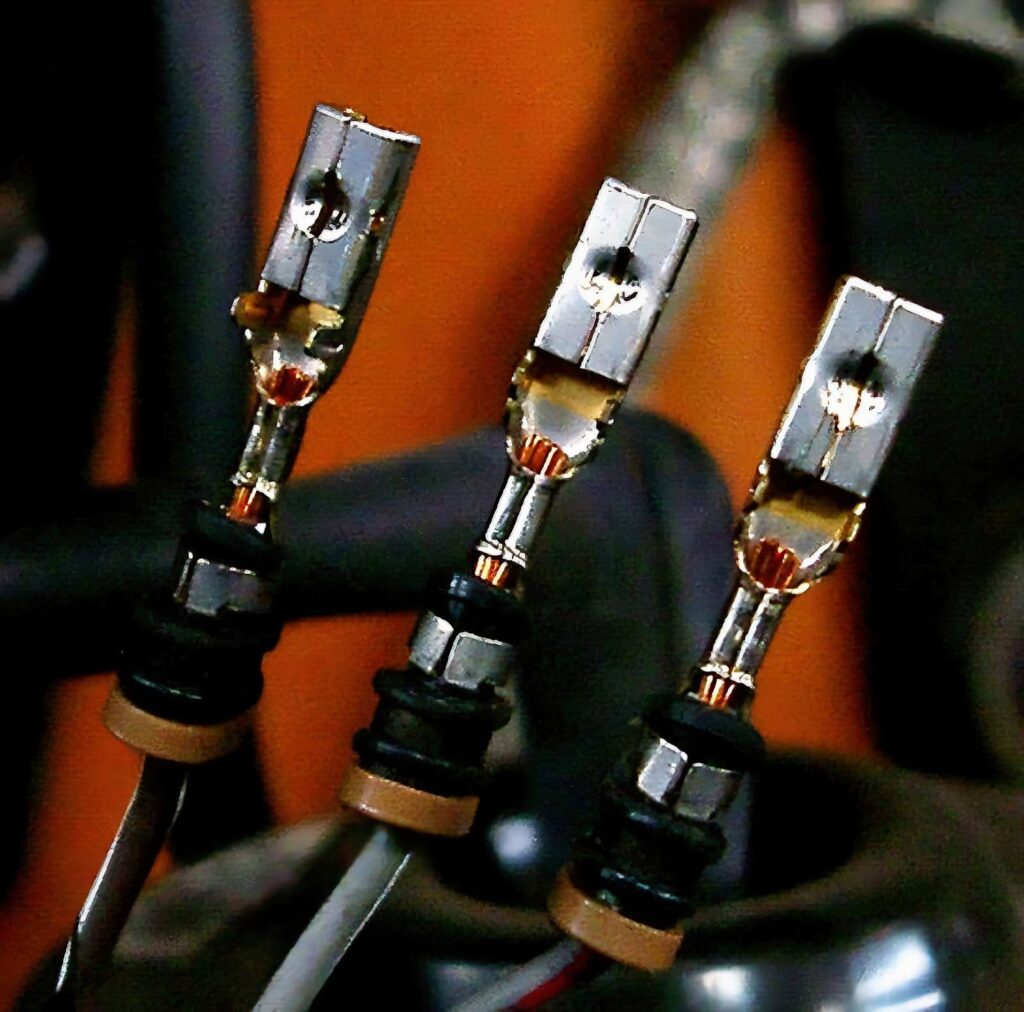
When done correctly, crimped wire connectors join snugly to the wire for good current flow from the wire to its connector and that connector’s mate.
Here are some helpful tips on how to prepare wire connectors for a crimp:

Inspect the Wire Insulation
Wires with damaged insulation will render the best crimps useless. Before modifying the wire, inspect the entire length for any issues visible to the naked eye. Look for broken, fractured, chafed or missing insulation.
If you find the slightest damage to the insulation that exposes the metal underneath, replace the entire wire if possible. Even the smallest hole in the insulating material leaves the wire vulnerable to the entrance of moisture.
If you can’t replace the wire or need to keep it for some reason, you’ll have to do something about the openings in the insulation before crimping the wire.
You have two methods of fixing damaged insulation. Either wrap it with electric tape or slide a heat shrink tube over it.
A heat shrink tube collapses inward when heated, but you must be able to slide it over the wire, and you can’t always do this without cutting the wire or unlatching it from its plastic connector shell. But if you’re splicing cut wires, it works well. It conforms to the wire’s contours, forming a protective layer that replaces the damaged insulation.
Heat shrink tubing will protect the wire from dust, moisture, and various types of damage. That being said, not all heat shrink is created equal. Some have resin that hardens to keep moisture and oxygen out, while some are simply a thin plastic sleeve that shrinks when heated.
Remember that patching damaged insulation on wiring assemblies is a temporary solution. In the time before you made makeshift repairs, the exposed wire might have already developed an issue.
Follow the Correct Steps for Crimping

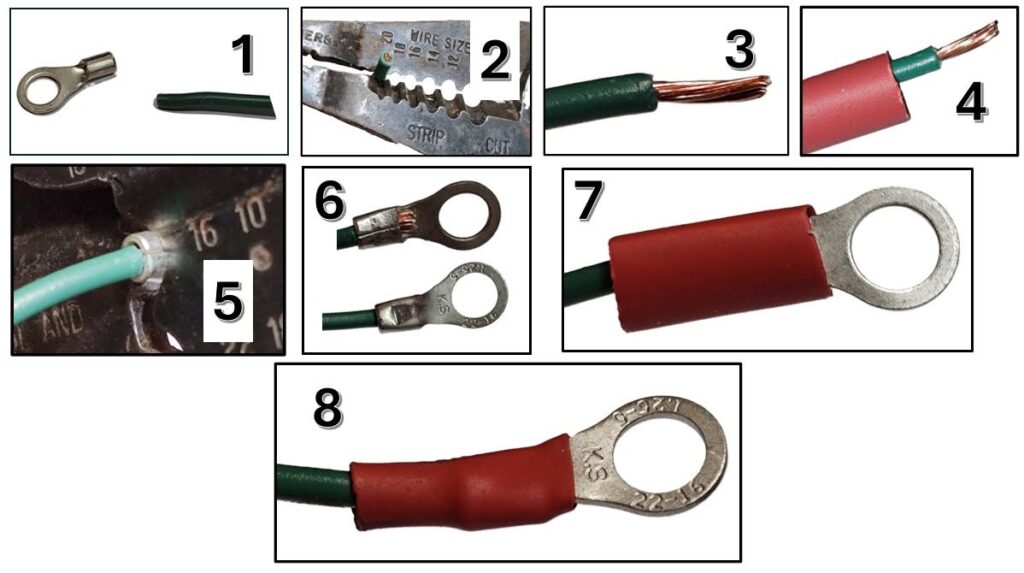
Here are the steps for crimping:
- Select the terminal.
- Strip a bit of insulation.
- Twist the wires together.
- Put shrink tube on the wire.
- Crimp the connector.
- Inspect and tug to be sure.
- Slide shrink tubing up.
- Apply heat to shrink tubing.
Alternatives For Wire Stripping Tools
Do you need to strip a wire but lack the dedicated tool for the job? You can use similar tools to remove the insulation material in a pinch. You generally want a knife with a sturdy blade and sharp edge.
A utility knife lives up to its name by doing various jobs that require cutting. It can serve as a makeshift wire stripping tool.
If you own a razor blade, you can use it to peel the insulation from the end of a wire.
In case you don’t have any other available bladed tools, you can use a lighter in a pinch. Hold the flame near the wire’s end. Once the material has softened, scrape it off the wire. Exert extra care while removing the melted insulation, particularly if you resort to using your bare fingers. The material is hot enough to inflict burns on your skin.
Choose the Right Wire Crimping Tool
You use a wire crimping tool to crimp the wire’s end. The crimper has multiple crimping jaws, allowing it to service different gauges of wire connectors. Use the crimping jaw designed for the connector.
When you crimp the wire, always apply sufficient force. Crimping requires considerable force to ensure the wire takes the correct shape.

Test the Crimped Wire Connection
Congratulations on successfully crimping the wire connectors. However, you have some more tasks to perform. You must test the connection to see if the joined parts will hold together or separate.
Gently pull on the crimped wire connectors. If the connection breaks, the crimp is too loose and needs correction. You’ll have to repeat the connection process and apply more force this time.
Check the Crimped Wire Connector Size
Did the crimped wire connectors separate when you tested their connection? One of the connectors might be too big.
Measure the wire connectors and see if they are the correct size. If one of the connectors is incompatible, you must find the right one.
Don’t Try to Undo Crimps
While crimping isn’t convoluted, it’s always possible to make a mistake. There’s also the chance that you might not like the existing crimped wiring connector. It’s understandable if you want to undo a crimp and make a new one.
Resist the urge to undo an existing crimp. If you go through the trouble of doing so, you might find the new crimp unreliable. The malleable material that makes up the wire can only withstand so much deformation. New crimps might also wear out faster.
Instead, cut the wire before the existing crimped wire connector. After you remove the old connector, crimp the freshly cut end. If the truncated wiring falls short, connect a short wire to extend it.
Where to Get Wire Crimping Tools for Your Ride
Finding the right wire crimping tools for your vehicle can be a challenge, especially when there’s a chance your local auto parts shops don’t carry them. But don’t worry. When you shop at CarParts.com, you don’t have to leave your home to find what you need. Simply visit our website, place your order, check out securely, and wait for your wire crimping tools to arrive at your doorstep.
We source our high-quality wire crimpers and wire strippers from trusted manufacturers to ensure they’re built to last. They’re also available at unbeatable prices. That means you won’t have to break the bank just to get new tools for all your DIY automotive repair needs.
All our wiring tools are on hand and ready to ship from a warehouse near you. That means you can get what you need in as fast as two business days. We also have a 24/7 customer service team ready to assist you if you have questions about your order.
Shop now and enjoy the best deals on our aftermarket wire crimping tools!
Any information provided on this Website is for informational purposes only and is not intended to replace consultation with a professional mechanic. The accuracy and timeliness of the information may change from the time of publication.


