My 2007 Chevrolet Suburban was due for brakes as well as new rotors. I decided to make it a father/son project and teach my 13 year old son how easy it is to do yourself. I went to CarParts.comand found the Power Stop Kit, K2068-36 I needed. This complete kit is designed specifically for trucks and SUV’s and includes heavy duty pads and drilled and slotted rotors for the front and rear axles. The tools needed to make the installation go smoothly include:
- Wheel Chocks
- Floor Jack, Jack stands
- Socket Set
- Small flat head screwdriver
- C Clamps
- TorxScrew driver (for front rotor screws)
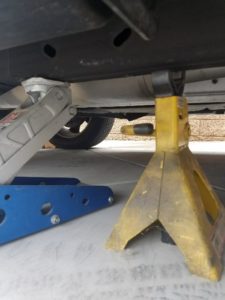
To get started you must have the vehicle parked on a level surface with the transmission in Park and the parking brake released. Then place a floor jacket in a position to lift from the vehicle’s frame. Before lifting, it is a good idea to loosen the lug nuts. Once lifted place a jack stand in line with the frame as a safety measure in case the floor jack should fade.


We started with the passenger side rear wheel. A flat head screw driver is used to pry off the center cap of the wheel exposing the lug nuts. Once lug nuts are removed the wheel can be pulled off and set aside. The rotor and brake caliper assembly are now both visible. First we need to remove the brake pads and caliper assembly and then the caliper bracket that
There are two bolts on the back side of the caliper bracket.


These bolts are highly torqued and I used the handle from my floor jack as an extension for mechanical advantage.Once the caliper assembly is free secure the caliper with a hanger or wire to avoid damaging the brake hose.


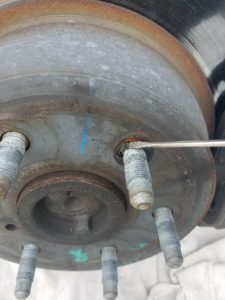
With the caliper assembly out of the way we started to remove the old rotor. The rear rotors are held in place by 2 retainer clips that slide over the lugs. If you have new ones you can just cut them away. We didn’t have new ones so I used a small flat head screwdriver to pry up the tabs and pull the clips off. The rotor should slide right off, unfortunately my rotors didn’t budge so I used a mallet to tap around the edges of the rotor. This helped to break the rust under the rotor. With some persuasion the rotor finally came off.
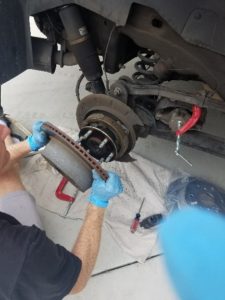

Power Stop labels each rotor for proper placement, so the correct new rotor was placed onto the lugs and fit perfectly. I reinstalled the retainer clips and bent the tabs back in place.
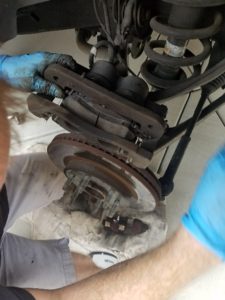
With the new rotor in place it was time for the brake pad swap out. Using a flat head screw driver I gently pushed out each pad from the bracket it was seated in. Pay special attention to the direction and orientation of the pads so that the new ones are put back in the same way. I usually take a quick picture just to ensure I put the new ones in properly.
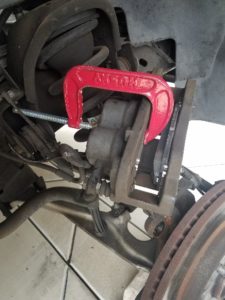
With the worn parts removed we reversed the process and installed the new Z36 Extreme Duty pads. The new pads slide into the bracket in the same direction that you pulled out the old ones. Make sure the pad surface is facing the center and the arch of the pad is toward the top of the caliper bracket. Because the new pads are much thicker, I used a c-clamp to compress the piston all the way back into the caliper. This allowed me to put the second pad on and then slide the assembly over the rotor. If you don’t compress the piston the assembly will not fit over a rotor.
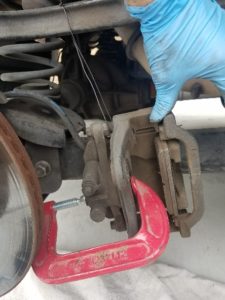
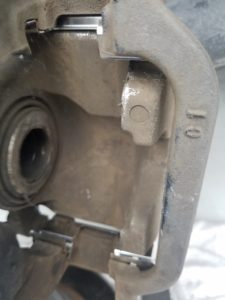


Now that the caliper assembly is on the rotor we reinstalled the bolts and torqued them to factory specifications. The wheel was put back on and then we used the same process for the other rear wheel.
The front wheels were similar but did have a few small differences. After loosening the lug nuts and jacking up the front of the Suburban, we positioned our jack stands and pulled off the front wheels. Using a socket wrench with my cheater bar, I removed the two bolts holding the caliper assembly in place and then secured it above the control arm. To remove the front rotor I removed the Torx set screw and freed the rotor from the hub with a few mallet taps.
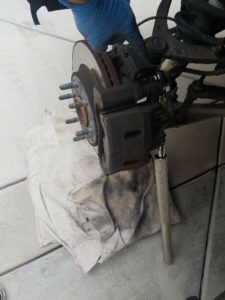
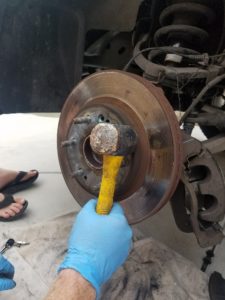

The new Power Stop rotor was labeled to help ensure I was putting the correct rotor in place, and it fit well. With the new rotor installed and set screw back on it was time to take apart the caliper assembly. Much like the rear, it is important to make note of how the pads and metal retainers are placed. The first time I put the pads in and tried to compress the piston I had trouble. After taking it back apart and looking more closely at the pads I realized there was two different pads for each side of the caliper assembly. Once I had the correct pads in the caliper assembly the piston compressed and I was able to slide it over the rotor. I then placed the two bolts back into the caliper assembly and was ready to put the wheel back on. The same process was used on the other front wheel.
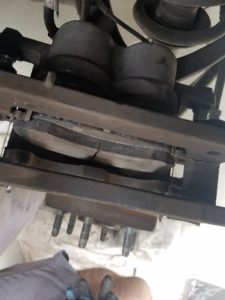


Once all wheels were checked it was time to road test the brakes. After a few pumps of the brake pedal to build pressure we hit the road. With new pads and rotors, it is important to follow proper break in procedures which can be found in the directions with product or Power Stop’s website.
I’m very happy with the Power Stop Z36 kit. The new rotors look great behind my factory wheels and the pads are quiet with more bite than the standard friction. I would definitely recommend Power Stop to anyone looking to upgrade or simply replace their existing brakes. They were easy enough to install with my 13 year old son and a few common tools. Thank You Power Stop!
To see the Power Stop Z36 Extreme Truck & Tow brake kit we installed please visit: http://bit.ly/2p0Lx9r
To visit the Power Stop Brandstore on CarParts.com and find a Power Stop brake kit for your vehicle please visit: http://bit.ly/2For0XF
Any information provided on this Website is for informational purposes only and is not intended to replace consultation with a professional mechanic. The accuracy and timeliness of the information may change from the time of publication.


