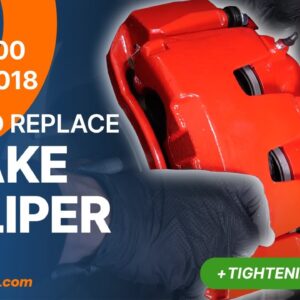
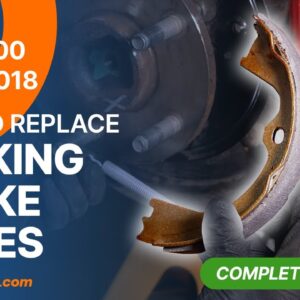
Watch this video to learn how to replace the front brake backing plate on a 2009-2018 Dodge RAM 1500.
Replacing Front Brake Backing Plate on a 2009-2018 Dodge RAM 1500: What You Need
Ready to perform this DIY replacement job? Remember that all the parts in this guide can be found on CarParts.com. Check out all the products that fit your vehicle right here.
Parts Checklist
- Front Brake backing plate
- Penetrating oil
Tightening Torques
- Wheel hub bearing holding bolts: 134 Ft-lbs
- Upper control arm ball joint nut: 40 Ft-lbs + Additional 200 degrees
- Wheel hub nut: 185 Ft-lbs
- Brake cliper mount bolts: 130 Ft-lbs
Tools Checklist
Here’s the toolbox we recommend to repair your Dodge RAM 1500: HM85 85 Piece Ratchet and Socket Set
List of tools:
- Hydraulic jack
- Jack stands
- Wheel lug wrench
- Wire brush
- Crowbar
- Breaker bar
- 36mm socket
- Clamp or iron thread
- Ratchet
- 21mm socket
- Flat head screwdriver
- 21mm wrench
- 10mm wrench
- Hammer
- Sandpaper
- Torque wrench
Step-by-Step Instructions
Step 1: Turn your engine off and set the parking brake.
Step 2: Loosen the stud bolts on the front wheels.
Step 3: Lift the front of your vehicle using a suitable jack. Refer to the video on “How to jack your RAM 1500 safely” for guidance.
Step 4: Place the vehicle on the jack stands.
Step 5: In order to change the front brake backing plate, you will need to take off the wheels to have full access. Don’t forget to put the wheels under the vehicle!
Step 6: Using a wire brush, start by brushing the hub nut and spraying it with penetrating oil.
Step 7: Then, locking the wheel hub rotation with a crowbar, unscrew the wheel hub nut using a breaker bar and a 36mm socket.
Step 8: It is now necessary to remove the caliper assembly. Attach a wire to the upper control arm of the vehicle to maintain the assembly when it is removed.
Step 9: Then using a ratchet and a 21mm socket, unscrew the two screws from the caliper mount. For more information, we recommend watching our video: “How to replace the front brake discs and brake pads RAM 1500?“.
Step 10: Then attach the assembly to the iron wire previously installed.
Step 11: Using a flat head screwdriver, pull the retainer away from the disc so you can unscrew it. Then remove the disc.
Step 12: Finish unscrewing the hub nut.
Step 13: Next, unclip the ABS sensor cable retaining clip behind the mudguard.
Step 14: Disconnect the connector by pushing on the red plastic tab, then prying the tab and pulling it.
Step 15: Then unclip all of the ABS sensor cable retaining clips using a flat head screwdriver, working down to the steering knuckle. You can now move the cable aside.
Step 16: You must then disengage the upper control arm ball joint of the wheel knuckle.
Step 17: Brush the upper control arm ball joint retainer nut and spray it with penetrating oil. Then release the ball joint with a ratchet and a 21mm socket.
Step 18: Use a 10 mm wrench to keep the ball joint from rotating.
Step 19: You can now remove the ball joint from the wheel knuckle, which allows the CV axle to be slightly removed from the wheel hub.
Step 20: You can now unscrew the 3 retaining bolts from the wheel hub using a ratchet and a 21 mm socket.
Step 21: You can now remove the wheel hub assembly from its location with a hammer.
Step 22: Removing the wheel hub allows you to remove the front brake backing plate.
Step 23: Remove the brake backing plate.
Step 24: Clean the inside of the hub with fine sandpaper and a wire brush.
Step 25: In our case, we took the opportunity to replace the wheel hub assembly while replacing the brake backing plate.
Step 26: Install the new brake backing plate on the wheel hub.
Step 27: Put the assembly in place on the steering knuckle.
Step 28: Tighten the 3 wheel hub assembly retaining bolts using the ratchet.
Step 29: Finish tightening using a torque wrench.
Step 30: Fully reinsert the CV axle into the wheel hub assembly.
Step 31: Reinsert the upper control arm ball joint into the wheel knuckle.
Step 32: Use the wrench to tighten the nut until it makes contact.
Step 33: Use a 10 mm wrench to keep the ball joint from rotating.
Step 34: Finish tightening using a torque wrench.
Step 35: Replace the hub nut.
Step 36: Then, while blocking the rotation of the hub with a crowbar, screw it back on.
Step 37: Finish tightening using a torque wrench.
Step 38: Put the ABS sensor cable back in place and clip it into its upper slot. Then reconnect it.
Step 39: Clip the ABS sensor connector back inside the mudguard.
Step 40: Then clip the sensor into its various slots.
Step 41: Reinstall the brake disc.
Step 42: Then put the retainer back in place.
Step 43: You can now re-install the caliper assembly. Screw it back on.
Step 44: Finish tightening using a torque wrench.
Step 45: Don’t forget to remove the cable that you used to hold the caliper assembly together.
Step 46: Then, you will be able to put the wheels back on your vehicle.
Step 47: Put the car back on the ground and block the wheels properly.
Step 48: Operation complete.
Compatible Vehicles
The operation and tools displayed in the video should be available on the following vehicles:
- 2009 Dodge Ram 1500
- 2010 Dodge Ram 1500
- 2011 Ram 1500
- 2012 Ram 1500
- 2013 Ram 1500
- 2014 Ram 1500
- 2015 Ram 1500
- 2016 Ram 1500
- 2017 Ram 1500
- 2018 Ram 1500
Important Reminders
- Once the operation is completed, you’ll need pump slowly on the brake pedal a few times until feeling a strong resistance from the pedal. The aim being to bring the brake pads closer to one other.
- Removing the wheel hub allows you to remove the front brake backing plate.
Disclaimer:
This video is for entertainment purposes only. CarParts.com, Inc. disclaims all damages including, but not limited to, actual, consequential, and/or punitive, for any liability, claim, or any other injury or cause related to or arising from any information or lack thereof posted in this video. No information contained in this video shall create any expressed or implied warranty or guarantee of any particular result. All mechanical car projects entail some risk. It is the sole responsibility of the viewer to assume this risk. If you are in doubt, please consult a licensed mechanic in your area.
Any information provided on this Website is for informational purposes only and is not intended to replace consultation with a professional mechanic. The accuracy and timeliness of the information may change from the time of publication.


