Your car’s cooling system includes a network of rubber hoses. The upper and lower radiator hoses are the largest of the group.
Because the radiator hoses are made of rubber, they eventually wear out over time. You might notice that your hoses are leaking, cracked, spongy, or brittle—these indicate that the hoses require replacement.
In this article, we provide comprehensive instructions on how to replace your radiator hose, as well as a list of the tools you’ll need.
Are you ready to take on the job yourself? Let’s find out.

Radiator Hose Replacement: How-To
The radiator hoses connect the engine to the radiator. Typically, the upper radiator hose connects to the thermostat housing and allows coolant to flow from the engine to the radiator.

Meanwhile, the lower radiator hose allows coolant to return from the radiator to the engine.
Replacing a radiator hose is usually fairly easy. For many people, the most difficult part of the job is bleeding the cooling system afterward (especially if they don’t have the proper tools).
Tools Needed to Replace a Radiator Hose
The tools needed to replace a radiator hose will vary, depending on the type of car you have.
In general, however, you’ll need:
- 50/50 pre-mixed coolant (consult your owner’s manual to determine the correct type of coolant for your vehicle)
- Air compressor (recommended)
- Cooling system vacuum fill tool (recommended)
- Fluid catch pan
- Fluid container
- Jack and jack stands
- Pliers
- Screwdrivers
- Repair manual or access to a repair database
- Safety glasses
- Wheel chocks
Radiator Hose Replacement Instructions
Before we begin, keep in mind—all vehicles are different. The information below is generic and for entertainment and educational purposes only. Be sure to follow the repair information for your specific application.
Repair manuals, such as those from Chilton, are useful, but a subscription to a repair database is even better. ALLDATA and Mitchell 1 both have single-vehicle subscriptions for DIYers that provide detailed factory repair information.
You can learn more about accessing quality repair information in this article.

Upper/Lower Radiator Hose Removal:
- Put on your safety glasses.
- Make sure the engine is off and has cooled.
Warning: Hot coolant can cause severe personal injury. Make sure the engine is cool before proceeding. - Safely raise and support the vehicle using a jack and jack stands. Set the parking brake and chock the rear wheels.
- Place a fluid catch pan under the hose you plan to replace.
- Remove the radiator cap.
- Drain the old coolant. You can do this by either disconnecting the lower radiator hose (recommended) or by opening the radiator drain petcock. Disconnecting the lower radiator hose is the safest route since petcocks can become brittle and break. Also, you might be replacing the lower radiator hose, anyhow.
- Use a pair of pliers or a screwdriver (depending on the clamp design) to loosen the hose clamps.
- Wiggle the radiator hose while pulling it toward you to disconnect it from the radiator.
- Allow the coolant to drain into the fluid catch pan.
- Wiggle the other end of the radiator hose while pulling it toward you to disconnect it from the engine.
Upper/Lower Radiator Hose Installation:
- Compare the new hose to the old hose to ensure that both are the same design.
- Slide the hose over the connection on the engine.
- Slide the clamps onto the hose, but do not tighten them down yet.
- Slide the hose over the connection on the radiator.
- Use a pair of pliers or a screwdriver (depending on the clamp design) to tighten the hose clamps.
- If you’re replacing both upper and lower radiator hoses, repeat the steps above on the second hose. Otherwise, move on to step #7.
- Safely remove the jack stands and lower the vehicle.
- Follow the instructions that come with the cooling system vacuum fill tool to connect the tool to your air compressor. The tool bleeds the cooling system of air while simultaneously refilling the coolant.
- Follow the instructions that come with the tool to refill the cooling system with a 50/50 mix of fresh coolant.
- If you do not have access to an air compressor and vacuum fill tool, consult a repair manual or repair database for the cooling system bleeding instructions for your vehicle.
Warning: If you do not properly bleed the air from the cooling system, overheating and engine damage may result. - Top off the coolant as needed and reinstall the radiator cap.
- Make sure the vehicle doesn’t overheat by starting the engine and monitoring the temperature gauge. Do this until the engine reaches operating temperature, and the electric cooling fan (if equipped) kicks in.
- Pour the old coolant from the catch pan into a large fluid container.
- Make sure to clean up any fluid spills with a rag. Coolant is deadly if consumed, and animals are attracted to it.
- Check online to find out where you can recycle your old coolant (pouring it down the drain is illegal). Usually, you can get rid of it at a landfill that accepts hazardous waste.
- After driving the vehicle for a day or two, re-check the coolant level and top off as needed.
Helpful Radiator Hose Replacement Video
To give you a better idea of how to replace a radiator hose, we’ve included a helpful video that demonstrates the process below:
Where to Get the Right Radiator Hose for Your Vehicle
Radiator hoses can develop leaks over time. If the one in your car leaks, then you’ll need to replace it to keep your vehicle’s cooling system functioning properly. Any leaks on the radiator hose are going to cause a wide range of cooling issues, which can result in significant engine damage. Thus, a faulty radiator hose shouldn’t be ignored. Luckily, CarParts.com can make searching for a replacement radiator hose easy.
CarParts.com lets you shop for the right radiator hose easily, thanks to our vehicle selector. Simply enter your vehicle’s year, make, and model to see a list of compatible parts. Have questions related to the part and its fit? Our friendly and helpful customer support team is ready to assist you anytime.
Don’t risk driving with a leaking radiator hose. Order a high-quality radiator hose at CarParts.com today.
Products Mentioned in this Guide
Any information provided on this Website is for informational purposes only and is not intended to replace consultation with a professional mechanic. The accuracy and timeliness of the information may change from the time of publication.


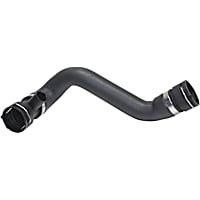
 Radiator Hose
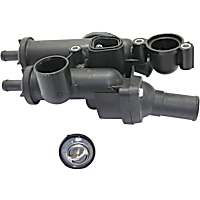
 Thermostat Housing
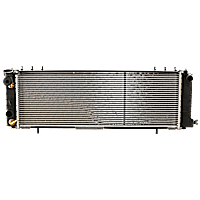
 Radiator


