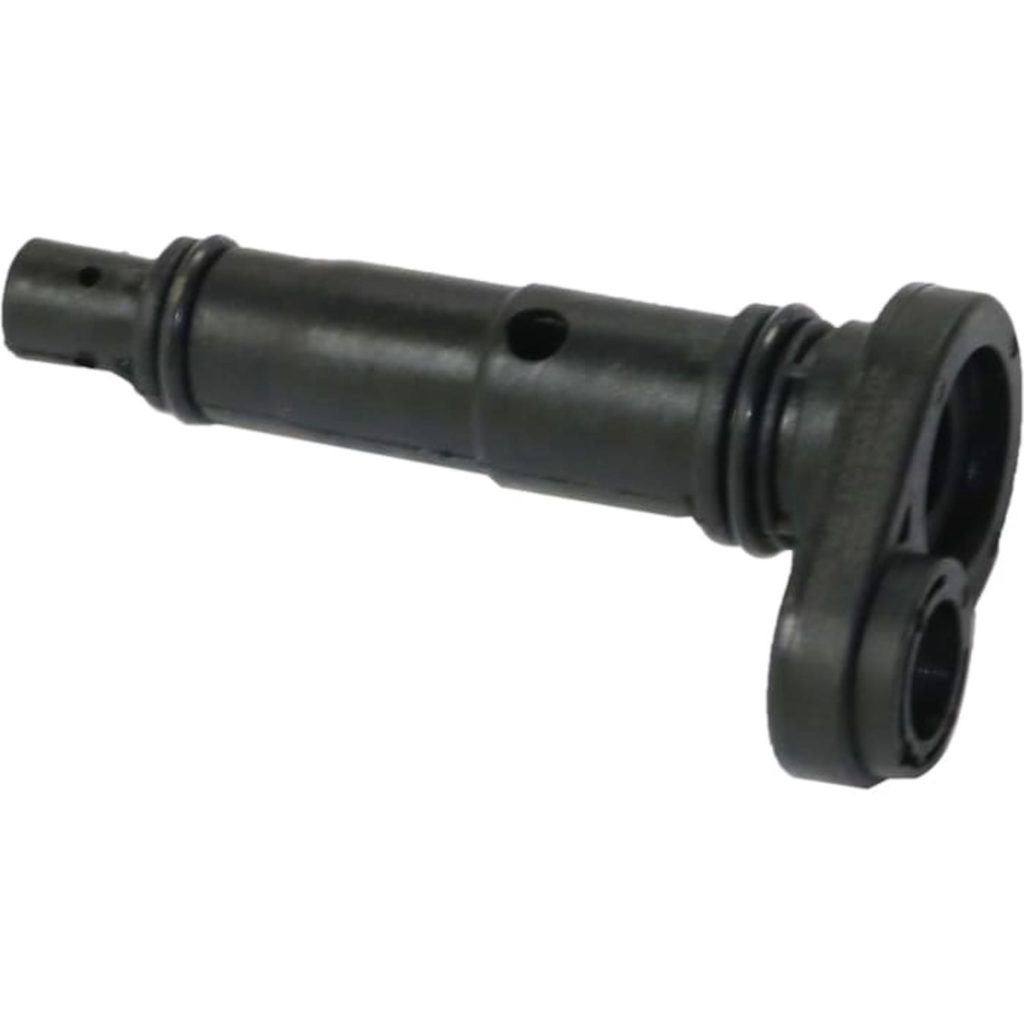
The PCV valve is a component on the upper portion of your engine that’s designed to vent the crankcase and reduce vehicle emissions. What does a PCV valve do? It draws high-pressure combustion gases (known as blow-by) from the crankcase and directs them into the intake manifold to be burned in the combustion chamber. inside the engine.
A lack of regular maintenance regarding your PCV system can eventually lead to issues, such as oil consumption, oil leaks, a rough idle, and oil in the air cleaner housing. To avoid this, consider replacing the PCV valve and checking the PCV’s vacuum source for a good strong flow.
PCV Valve Replacement: How-To
Replacing a bad PCV valve is typically an easy, inexpensive task that could help prevent more expensive problems later on. If you find yourself with a PCV valve that’s due for replacement, below are the necessary steps you should take to swap it out.

Note: The following are general guidelines for educational purposes only. For repair instructions specific to your vehicle, please consult a repair manual or a repair database. Follow the recommended safety procedures to replace your PCV valve without a hitch.
Tools You’ll Need to Replace the PCV Valve
- Replacement PCV Valve
- Gloves
- Basic automotive tools
- Repair manual
- As needed: PCV valve hose, valve cover grommets
PCV Valve Replacement Instructions
- Locate your PCV valve.
- If your PCV valve is held in place by a rubber grommet, you can pull the valve out by hand. Other PCV valves are threaded in. For the latter, use a wrench or ratchet to unscrew the valve.
- Remove the valve and check the hose. If you see any damage to the hose, consider replacing it as well.
- If the rubber grommet also appears worn or damaged, a replacement is in order.
- Screw in the new valve by hand or push it through the rubber grommet (depending on the vavle’s design). If the valve is threaded in, use a wrench or ratchet to tighten it down until it’s snug. Do NOT overtighten it.
- Reconnect the hose.
- Start the engine and make sure everything looks okay.
How Do You Test a PCV Valve?
The easiest way to check your PCV valve is to shake it after taking it out. In most cases, if it does not make a metal rattling sound when shaken, it’s faulty and needs to be replaced.
On the other hand, if the valve makes a rattling sound, that doesn’t necessarily mean it’s good because the spring inside could still be weak. Since, typically, PCV valves are inexpensive, you should replace yours if there’s any doubt as to whether it’s still functioning well.
Furthermore, you should always replace the PCV valve according to the vehicle manufacturer’s recommended service schedule.
How Do You Know If the PCV Valve is Bad?
There are several signs that could indicate a failing PCV valve. Here are the most common bad PCV valve symptoms you should look out for:
- Buildup of sludge in the engine
- Oil leaks
- Low whining or whistling sound
- Oil in the air filter housing
- Check engine light on (codes P0171 and P0174 could be activated)
- Increase in internal engine pressure/engine surge
- Gray-white smoke
- Oil consumption
- Rough idle
If these symptoms are left unchecked, they could easily lead to engine failure or complications that could affect your vehicle’s drivability later on. Replacing your PCV valve is an easy, inexpensive, and low-risk preventative maintenance measure you can do. Avoid expensive repairs later on by addressing these symptoms today and replacing your faulty PCV valve.

How Often Should You Replace Your PCV Valve?
A faulty PCV valve can damage your engine if left unchecked. You should always replace the valve at the interval suggested by the vehicle manufacturer. You can find this information in the service schedule listed in your owner’s manual. Additionally, if you notice any symptom of a failing PCV valve, consider replacing it right away.
Note: Not all vehicles have a traditional PCV valve. Some have a calibrated orifice or oil/vapor separator instead.

If you’re confident in your DIY skills and want to save on time and money, you can replace the PCV valve yourself. All you have to do is follow the appropriate instructions and prepare all the tools and components needed to facilitate the repair.
Maintaining Your PCV Valve
To avoid costly repairs in the future, consider adding your vehicle’s PCV system to your maintenance routine. Though some car manufacturers suggest servicing the system every 20,000 to 50,000 miles, this is not a standard set in stone. It’s different for every vehicle, so to be sure, a frequent system inspection is the best option to keep your engine performing at top condition.
Preventive maintenance, including routine oil changes, can positively impact the durability of your PCV valve.
Remember to always consult your owner’s manual for specific instructions on maintenance.
The Origin of the PCV Valve
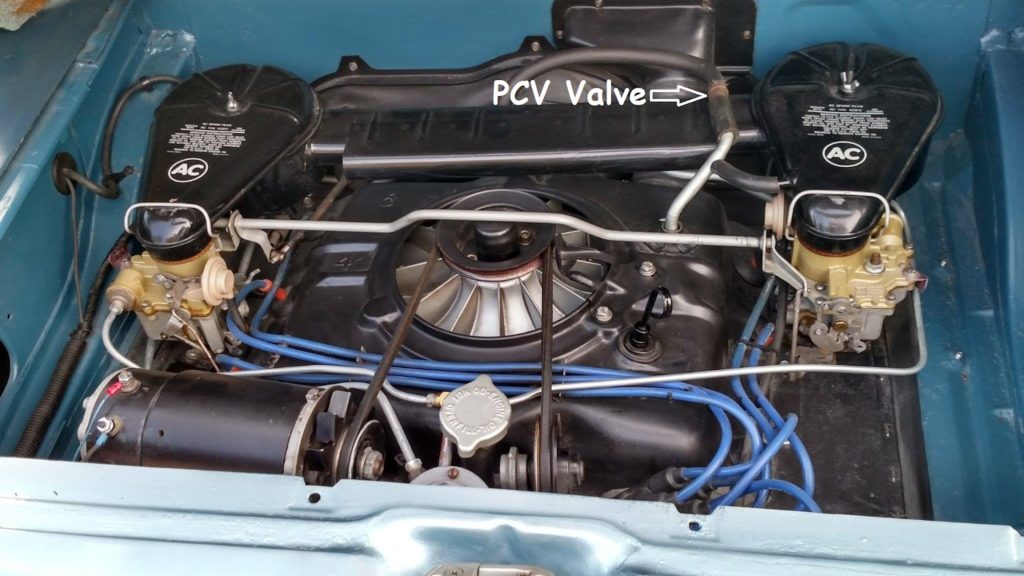
The first American vehicle fitted with a Positive Crankcase Ventilation (PCV) valve was the Corvair.
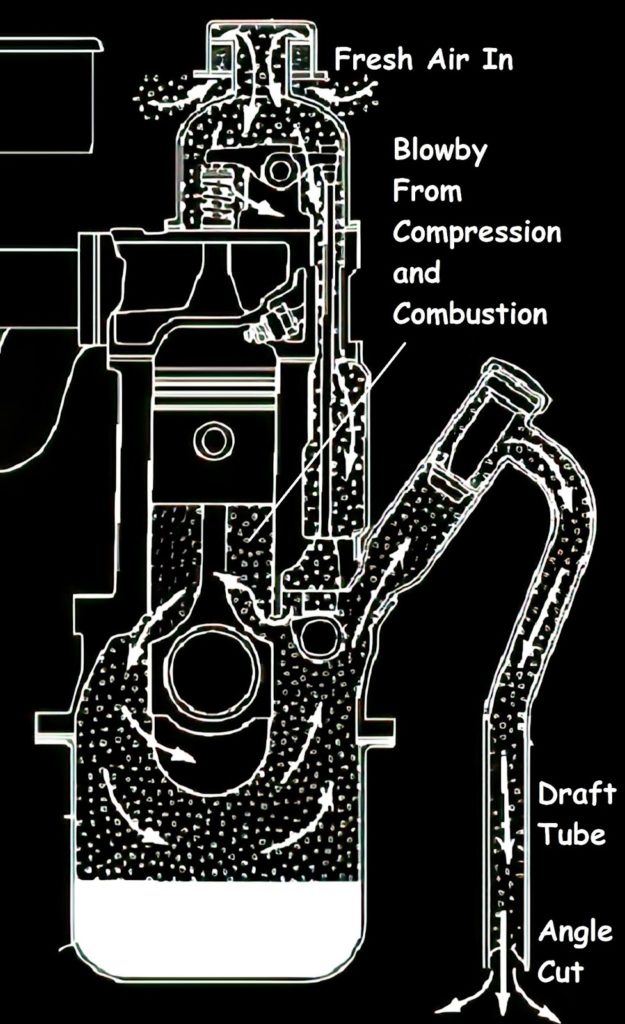
Prior to the advent of the PCV valve, crankcase pressure from piston ring blowby was vented to the atmosphere using a “draft tube” that was cut at an angle and mounted so that the air passing beneath the vehicle would create a mild negative pressure to draw the vapors out. In traffic, this became a problem in large cities and filled the air with smog.

The PCV system replaced the draft tube system and was initially designed to draw clean air through a small filter into the crankcase, purging the crankcase blowby gasses and processing them in the combustion chamber.
You might remember the big hose that connected from one of the valve covers and snapped onto the side of the old round metal air cleaners, and inside the air cleaner there was a small filter. That’s where the PCV system gets its fresh air supply on those older vehicles.
On newer vehicles, the PCV “closure” hose that provides fresh air is almost always connected to the air intake tube between the breather and the throttle body. This provides a clean air supply and allows the mass airflow sensor (MAF) to measure PCV airflow for precise PCM fuel delivery calculations.
On that kind of system, leaving the oil filler cap loose or having a bad oil filler cap gasket can cause unmetered airflow to enter the intake and skew fuel trim numbers. If you have a scan tool that will show fuel trim, just remove the oil filler cap with the engine running and the fuel trim numbers will begin to change.

Some Asian makes don’t have a PCV valve; they simply connected a vacuum line to the rocker arm cover with a small orifice. 4.0L Jeep engines work the same way. The PCV orifice is at the rear of the rocker arm cover and is replaceable if it clogs.
Some GM engines have what looks like a normal PCV valve but there are no internal parts, only a small orifice. Other GM engines have the PCV orifice built into the rocker arm cover.
PCV orifices and PCV valves can clog, but in that case, the crankcase vapors steam out of the closure tube and into the breather or intake air stream. If you disconnect the closure tube with the engine running and hold a finger over it, you should feel a slight vacuum there if the PCV system is flowing properly. If you see oil steam at the disconnected closure hose with the engine running and/or oil in the air cleaner or intake hose, the PCV system isn’t working properly and may need more than a PCV valve. The vacuum feed can clog with sludge as well.
Get a New PCV Valve Online
Oil leaks, rough starts, and black smoke might be a sign that your vehicle has a faulty PCV valve. You shouldn’t waste any time getting a replacement because a faulty PCV valve can cause engine failure down the road. Good thing you can get an affordable PCV valve here at CarParts.com.
CarParts.com has a wide selection of auto parts and accessories sourced from trusted and well-known manufacturers. We do this to ensure you get high-quality parts, no matter what you order. Take advantage of our vehicle selector and search filters to make it easier to find parts that fit. Our strategically located warehouses also means you can get your order in as fast as two business days.
Don’t wait for your PCV valve to fail completely before replacing it. Get a high-quality replacement PCV valve at CarParts.com today!
Any information provided on this Website is for informational purposes only and is not intended to replace consultation with a professional mechanic. The accuracy and timeliness of the information may change from the time of publication.


