Brake caliper replacement is pretty simple – until you get to the bleeding part. Then you’ll need a friend (and possibly a whole lot of patience) to finish the job. Fancy bleeder tools help as well.
Brake Caliper Replacement Costs
If you decide to have a professional replace your caliper, which is a smart move if you’re uncertain of your mechanical prowess, expect to pay anywhere from a few hundred dollars to over $1,000. That’s certainly not chump change, but it beats having brake problems if you do the job incorrectly.
However, if you’re confident that you’re up to the task, you can cut labor costs and expect to pay $50 to $100 for a replacement caliper. Some calipers are brand-new, while others are remanufactured.
What Tools Do You Need to Install a Brake Caliper?
The tools needed to replace a brake caliper vary, depending on what type of car you have. But in general, you’ll need:
- A good buddy or a one-person brake bleeding tool
- Appropriate size line wrench
- Brake fluid
- Brake line plug (sold at most auto parts stores)
- Breaker bar
- C-clamp or disc brake spreader
- Fluid catch pan
- Jack and jack stands
- Large screwdriver or pry bar
- Plastic container
- Ratchet and appropriate size sockets (some calipers may require a Torx or Allen head socket)
- Rubber hose that fits the bleeder screw
- Safety glasses
- Torque wrench
- Wheel chocks
Should You Do the Job Yourself?
We’re talking about your brakes here. If you have any doubts about tackling the job, don’t do it yourself. Let a professional complete the work instead.
On the other hand, if you’re savvy with a wrench, brake caliper replacement is usually a fairly simple task. As was mentioned, the toughest part of the job is the post-replacement brake bleeding.
Brake Caliper Replacement
Now we get to the fun part: brake caliper replacement. Are you ready to grab a wrench and get dirty? Good.
Before we start, however, keep in mind that all vehicles are different. Be sure to follow the repair information for your specific application. Repair manuals, such as those from Chilton, are useful, but an ALLDATA subscription is even better. ALLDATA has single-vehicle subscriptions for DIYers that provide detailed factory repair information.
Note: The following are general guidelines for educational and entertainment purposes only. Consult your vehicle’s factory information for specific repair instructions and recommended safety precautions.
Also, this generic guide covers front brake caliper replacement. The procedures for rear caliper replacement are different.

Removal
- Put on your safety glasses.
- Use a breaker bar to loosen the wheel lug nuts. Do not remove the nuts completely at this time.
- Safely raise and support the vehicle using a jack and jack stands. Chock the rear wheels and set the parking brake.
- Remove the lug nuts by hand. Then remove the wheel and tire assembly.
- Place a fluid catch pan under the caliper.
Warning: Brake fluid is corrosive. Keep it away from your car’s finish. - Unbolt the brake line from the caliper. Set the banjo bolt and sealing washers aside.
- Plug the brake line using a brake hose plug. This is done to prevent brake fluid from leaking out during repair. If you lose enough brake fluid, the master cylinder will go empty, making the brakes more difficult to bleed.
- Remove the caliper mounting bolts.
- Remove the caliper by pulling it up and away from the rotor. If the caliper is stubborn, you may need to use a large screwdriver or pry bar to help remove it.
- Remove the brake pads from the caliper (this is only necessary for fixed calipers).
Installation
- Prepare the new caliper for installation by following the instructions included in the box.
- Most new calipers come with the piston fully seated in its bore. But if yours does not, you’ll need to push the caliper back in its bore using a C-clamp or disc brake spreader. When doing this, keep an eye on the master cylinder to ensure fluid doesn’t get pushed out of the reservoir.
- Install the brake pads into the brake caliper (this is only necessary for fixed calipers).
- Position the new caliper over the rotor.
- Tighten down the caliper mounting bolts and use a torque wrench to tighten them to your vehicle manufacturer’s specifications.
- Remove the brake line plug.
- Reinstall the brake line with the banjo bolt and new sealing washers (replacement calipers usually come with new washers). Use a torque wrench to tighten the banjo bolt to your vehicle manufacturer’s specifications.
- Refill the master cylinder as needed.
- Bleed the brakes either manually with an assistant or with a special tool (pressure bleeder or vacuum bleeder).

You need to bleed all four brakes, not just the one you serviced. The procedure usually starts at the brake caliper or wheel cylinder (if you’ve got rear drum brakes) farthest from the master cylinder. Typically, the sequence is as follows: right rear, left rear, right front, left front.
To bleed your brakes with a buddy:
- Ensure that the master cylinder is full of fluid.
- Attach a rubber hose to the end of the bleeder screw and make sure the hose fits snugly over the screw’s nipple. Submerge the other end of the hose in a clear container (such as an old water bottle) partially filled with brake fluid.
- With the engine off, have an assistant depress the brake pedal then hold it to the floor. Instruct your friend to tell you when they are holding the pedal down.
- Using a line wrench, crack the bleeder screw open but do not remove it. Tell your assistant that you have the bleeder open.
- Allow fluid to run from the bleeder screw into the container. Watch for air bubbles entering the container.
- When fluid stops flowing, close the bleeder and tell your assistant that it’s closed. Your assistant can now release the brake pedal.
Note: You’ll want to keep an eye on the master cylinder fluid level during this procedure. Air will get sucked back into the system if the master cylinder runs out of fluid.
- Repeat the procedure until no more air is seen coming from the bleeder.
- Move to the next corner of the vehicle and repeat the bleeding procedure until you’ve covered all four wheels.
- Once the entire system has been bled, check brake pedal feel. It should be firm. If not, continue to bleed the brakes until pedal feel is satisfactory.
10. Reinstall the wheel/tire assembly onto the lug nuts.
11. Tighten the lug nuts until they’re snug using a ratchet and socket.
12. Safely remove the jack stands and lower the vehicle.
13. Use a torque wrench to tighten the lug nuts to your vehicle manufacturer’s specifications.
14. Before driving the vehicle or putting it in gear, pump the brakes several times to ensure they feel firm. DO NOT drive the car until the brakes feel solid.
Brake Caliper Replacement Tips
If you have a bad brake caliper, don’t bother trying to rebuild it. Most replacement calipers are cheap enough that rebuilding isn’t worth the hassle. You don’t want to mess with your brakes, so be sure to get a quality new or remanufactured caliper from a reputable manufacturer.
Check out these videos for more tips on how to replace your brake caliper:
One last tip: Check the condition of your brake pads and rotors. If they’re worn, now’s the time to replace them. Same goes for your brake hoses.
Brake Caliper Replacement FAQs
Here are the answers to some of the frequently asked questions (FAQs) about replacing brake calipers.
When should brake calipers be replaced?
Compared to other brake parts like the pads and shoes, brake calipers are built to last longer, usually around 75,000 miles.
By this time, the calipers’ rubber seals could have hardened, increasing the risk of the brakes sticking and fluid leaking.
Can brake calipers be installed on the wrong sides?
Yes. In some cases, proper brake caliper installation involves identifying the component’s right hand and left hand designation.
If the caliper is installed on the wrong side, you won’t have a firm brake pedal because the bleeder screw will be at the bottom.
When should you consider replacing your brake caliper?
A vehicle that’s pulling to one side, uneven brake pad wear, leaking brake fluid, clunking noises, and squealing are some of the most common symptoms that point to a damaged or worn-out brake caliper.
What’s a common mistake when replacing brake calipers?
A common mistake DIYers make when replacing brake calipers is exerting too much torque on the guide pin bolts.
These bolts typically require anywhere between 25 to 35 ft-lbs of torque. Going beyond this range can break the bolt’s head off.
Get a Quality Replacement Brake Caliper That Fits Your Car
Driving around with a bad brake caliper is a disaster waiting to happen. The brake caliper is an integral part of your vehicle’s braking system, which means if it stops working, it’s only a matter of time before your brakes start malfunctioning too. It’s a big risk to you and your passengers’ safety, so it’s best to replace your faulty brake calipers as soon as possible. Luckily, getting new brake calipers is easy with CarParts.com.
With our easy-to-use website and search filter, you can find replacement brake calipers that fit your vehicle. Just input your vehicle’s year, make, and model using our vehicle selector to make it easier to browse our catalog. You can also enjoy fast shipping, thanks to our strategically located warehouses around the US. If you order by 12 p.m. ET, you can even expect your brand-new brake calipers to arrive in as fast as two business days.
Don’t wait for the worst-case scenario to happen before replacing your faulty brake calipers. Get brand-new brake calipers from CarParts.com today.
Products Mentioned in this Guide
Any information provided on this Website is for informational purposes only and is not intended to replace consultation with a professional mechanic. The accuracy and timeliness of the information may change from the time of publication.

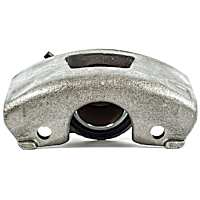
 Brake Caliper
 Brake Master Cylinder
 Piston
 Brake Pad Set


