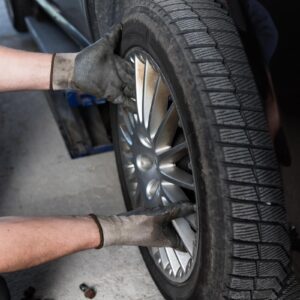
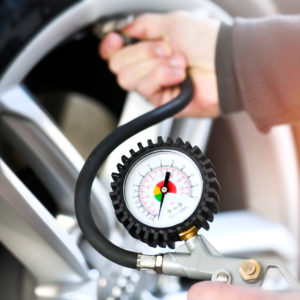
There are two ways to separate the tire from the rim: manually and with the help of a tire-changing machine.
How to Remove the Tire From the Rim Manually
If you don’t have access to a tire-changing machine, you’ll have to do the removal the old-fashioned way. To start, you’ll need the following tools to remove the tire from the rim:

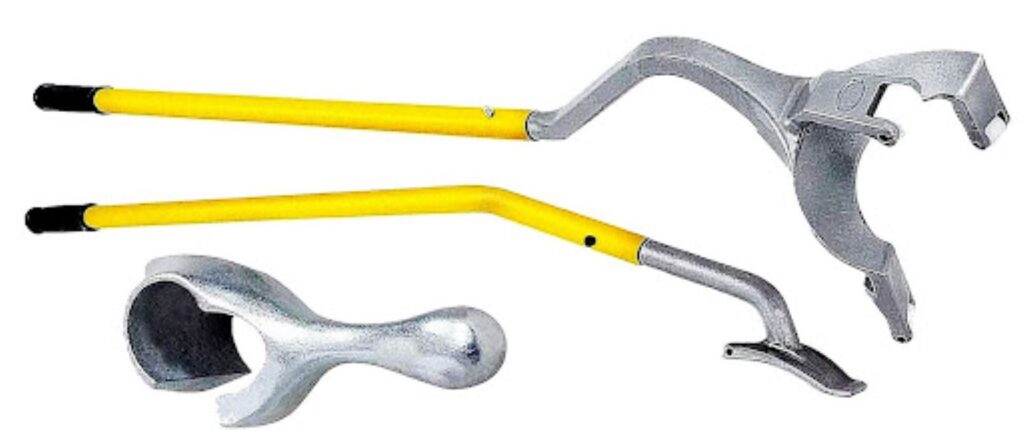
Other tools you will need:
- Tire irons
- Lug nut wrench/impact wrench
- Valve stem tool
- Safety glasses and gloves
Remove the Valve Stem Cap
Removing the valve stem cap depresses the valve core and releases the air pressure from the tire. Make sure the tire is fully deflated to make it easier to separate the tire bead from the wheel rim.
Loosen the Lug Nuts
Using the lug or impact wrench, loosen the lug nuts without fully removing them to prevent the wheel from spinning when you remove the tire. This makes the succeeding steps easier to execute.
Secure the Wheels
Use wheel chocks to secure the opposite wheels from the ones you’re working on. This step prevents the wheels from moving due to instability caused by the wheel you’re working on.
Lift the Vehicle
If you don’t have wheel chocks, you can lift the vehicle using a car ramp or a hydraulic jack to ensure the car doesn’t fall out of balance. Follow the instructions that come with the ramp/jack to safely lift the car.
Remove the Wheel Nuts
Align the lug wrench with the previously loosened wheel nuts and rotate clockwise to fully remove them.
Break the Bead Loose from the Rim
This can be very difficult sometimes. Place the tire iron between the tire and rim and apply some force to separate the two. Work around the tire to fully detach the two components before using a valve stem tool to release any remaining air pressure.
You can also apply lubricants to the tire’s bead to make it easier to slide off the rim.

How to Remove the Tire From the Rim Using a Tire-Changing Machine
A tire changing machine makes it easier to remove the rim from the tire. Hydraulically operated, it uses compressed air and hydraulic oil to compress the tires and release them from the seals with the wheels. This machine significantly reduces the amount of time it takes to separate the rim from the tire.
Before using the machine, ensure you have the following tools and equipment on hand:
- Tire valve removal tool
- Eye protection
- Bead breaker
- Lubricant
Remove the Air From the Tire
Wear eye protection before using the tire valve removal tool to unscrew the valve core and let the air escape.
Separate the Tire From the Bead Seat
Use a bead breaker to separate the tire from the wheel’s bead seat. The bead seat is the reinforced section of the tire that makes contact with the rim. It maintains a seal between the wheel and tire to hold air.
To use the bead breaker, position it against the tire bead and apply enough pressure to dislodge the bead. Repeat as needed to break the bead on both sides of the wheel.
Install the Tire on the Machine
Install the wheel assembly flat onto the tire-changing machine and use the foot-pedal control to lock the wheel to the changer. Remove the tire from the wheel by positioning the arm of the machine against the rim.
Separate the Tire From the Wheel
Place the tire tool between the bead of the tire and the wheel. If you can, use tire lubricant to prevent damage. Soapy water works well, but there is a special lubricant you can use for this process.
Step on the foot pedal that causes the table to move. This should separate the tire from the wheel.
Remove the Tire Using the Bead Foot and the Turntable
Lastly, reposition the tire tool to remove the lower bead of the tire from the wheel. As the table of the tire change is rotated, the tire is released from the wheel.
Tips on How to Safely Remove the Tire From the Rim
While it requires some elbow grease, detaching the tire from the rim is a straightforward process. However, it can come with some risks if done improperly. Follow these safety tips to make sure everything goes off without a hitch during removal:
Don’t Use Excessive Force
Using excessive force when separating the rim from the tire can damage the rim. The process is tedious when you don’t have a tire-changing machine, but you still need to treat it with care. After all, the point of separating the two is to change a tire with damage, such as chips, punctures, and the like.
Do the Removal in a Well-Ventilated Location
Tires release vapors that have numerous toxic compounds, like benzopyrene, that could cause cancer. The vapors are what causes the “tire smell” we all know. As such, it’s crucial to find a well-ventilated area to work on the tires.
Use Safety Equipment
A face mask can help you avoid inhaling harmful tire vapors, so make sure you wear one before starting. Wear safety glasses and gloves as well to prevent injuries when deflating the tire and prying it off from the rim.
Properly Tighten the Lug Nuts
Once you install the new tire, ensure you properly tighten the lug nuts to prevent the wheel from wobbling as it rotates. You can find the recommended torque on the manufacturer’s website or the instructions/specifications that come with the tire.
Use Lubricant
Using lubricants around the edges and under the rim/tire makes it easier to pull the tire out over the rim’s edge. It doesn’t have to be a specialized solution. Something simple like oil or dish soap should do the trick.
How to Get Your Hands on Tools to Help You Remove Tires
If you want to remove bad tires, you’re going to struggle immensely without the right tools to get the job done. Typically, this means you need to get your hands on equipment like tire irons, lug nut wrenches, and even safety equipment. Tire-changing machines can also help. The tricky part, however, is knowing where to get these tools.
Fortunately, with the help of CarParts.com, getting your hands on equipment for your garage is easier than ever. You won’t even have to take one step outside your door. You can order online or dial our toll-free hotline to shop.
We make it a point to get our tools and auto parts from some of the most trusted manufacturers in the industry. Each item in our catalog is carefully selected by a team of professionals to guarantee both quality and longevity. In addition, our warehouses are located all over the US, meaning you can receive your order within a matter of days.
Take advantage of our fast shipping and unbeatable prices. Shop now!
Any information provided on this Website is for informational purposes only and is not intended to replace consultation with a professional mechanic. The accuracy and timeliness of the information may change from the time of publication.


