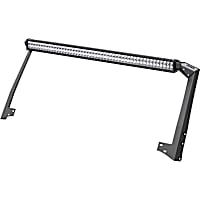
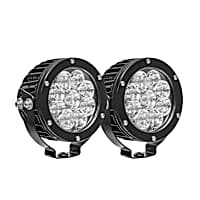
Energy-saving features, customizable colors, intense illumination—these are the things that car lighting enthusiasts love about LED light bars. These light bars allow for better road visibility when going off-road and are very reliable during inclement weather conditions.
So where do you find a light bar installation shop near you? The answer: your garage. Simply follow these five easy steps on how to install LED light bar and you won’t have to pay a single cent to a mechanic!
Step 1: Prepare the vehicle
First, disconnect your car battery. To avoid shorting it, remove the wire of the ground terminal first, followed by the positive terminal.
Note: If you just remove and isolate the ground terminal from the battery you can leave the positive terminal connected. Just removing the positive terminal isn’t sufficient, though, because a short can still occur between the frame and the positive battery terminal.

Step 2: Set up the LED light bar
After prepping, mount your light bar. It is important to consider sturdiness when choosing a mounting location. It’s also important not to drill holes anywhere that would allow rainwater to enter the passenger compartment.
Your mounting points should be solid enough to hold your light bar in place whenever you go off-roading. Again, don’t drill holes that will cause water leaks into the interior of the vehicle, but if you must mount the bar to thinner metal, you may use “fender washers.” These are large washers with small holes made for this purpose.
In addition to not causing passenger compartment leaks, no other automotive parts should be compromised during the light bar installation.
Step 2.1: Mark the LED light bar holes
IMPORTANT REMINDER: Wear eye protection. Mark your holes using a marker pen (most light bars come with a printed paper template). Center punch before drilling to prevent the drill bit from “walking” as it begins to spin. Begin with a small drill bit and follow up with the larger bit that is the correct size unless you’re using a Unibit ®.
Step 2.2: Mount the light bar
Mount the light bar using bolts and nuts (self-tapping screws aren’t a good choice unless they’re the only way). Use a flat washer under the head of the bolt, and under the nut, a flat washer and a lock washer, with the lock washer closest to the nut. Most light bar kits come with fasteners and special washers.
Don’t completely tighten the bolts until you’ve made all the necessary adjustments to the mounting and don’t tighten any of the fasteners (nuts and bolts) until you’ve got all of them installed.

Buy or Build your own wiring harness
The usual LED light bar kit comes with mounting brackets, wires, nuts and bolts. In most cases, a wiring harness is also included. If not, then you can always purchase it separately or if you’re confident, you can build a harness, but make sure you have an in-line fuse where you connect to the B+ power source. If you’re building the harness, run the wires through a loom if the bracket doesn’t have a hollow channel for the wiring, and make sure you secure the wire harness with black wire ties or harness straps.
If you’re buying a wire harness, always consider the LED light bar type and your vehicle’s wiring system. If you got the LED light new, it’ll come with wires and the fuse holder. Be smart when routing the wires. The more time you take to do it right, the less likely you are to have problems with the power wire(s) shorting to ground and blowing the fuse.
Make sure that your wiring harness is untangled to properly identify your wires. The harness consists of a switch, a red power cable and a black ground cable (comes with ring terminals), a relay, and a pair of connector wires (negative and positive) for the light bar.

Step 3: Set the switch in place
Start by detaching the switch wire segment from the main harness, then route and find your way through your firewall to reach the dashboard. After finding the desired location, use an adhesive type to put the switch in place. Reconnect the other end wiring line of the switch back to the wiring harness.
Some switches will have a bracket that mounts under the dash with screws, and some installers might want to install the switch in an existing switch plug (that’s the place on some dashboards where OEM switches would be if the vehicle had been built with more options). Wherever you mount the switch, use discretion when routing the wires and secure them to existing harnesses if possible. Avoid routing the harness near sharp edges of brackets and/or moving components under the dash. Likewise, in the engine compartment, follow the same rules and keep the wiring clear of hot exhaust components.
Step 4: Position the relay and the cables
You can bolt the relay anywhere on your firewall as long as its location is near the battery. Afterwards, take the red positive cable and mount it directly to the red terminal of the battery. Conversely, ground the black negative cable by attaching it to the chassis. Make it a point to cleanly tuck the excess wires and cables in the engine bay and avoid putting the wires close to high-heat zones.

Some newer vehicles will actually have open connection points (studs connected to B+) right on the fuse panel. Do a good job making the connections. Remember: every job is a picture of the person who did it, so do it as neatly as possible!
Step 5: Wire harness to the light bar
Now work on the remaining set of wires on your harness. They are the connectors to your LED light bar. Run them to where your light bar is. Hook up the connector wires to your light bar (red to red and black to black). When everything is in place, go back to your light bar brackets and adjust the light bar’s angle. Secure by tightening the bolts once you’re satisfied with the position. That’s it! You can now turn on the light and enjoy your upgraded lighting system.
Things to Keep in Mind
LED light bars are off-road lights. In most states, they are not legal to use on streets and highways. As such, it’s imperative to check your local road laws first before mounting one on your car.
Now, here’s one more important question we usually get from our readers and customers: “So where can I find the best parts for light bar installation near me?” Well, you need not go far because CarParts.com has you covered. Browse our selection right here.
Getting Your Hands on an LED Light Bar
You know how to install an LED light bar, but finding one for your daily driver at your local auto parts shops can be tricky. Why not skip the hassles of visiting shops by shopping online at CarParts.com?
Our website makes it easy for car owners like you to find the right LED light bar for your ride. Simply use your mobile device or computer to visit our website. Fill out the vehicle selector to narrow down the selection to direct-fit bars, then use the filters to find the ones that match your preferred brand, price, color, finish, and more.
We source our LED light bars from the most reliable names in the industry to ensure they’re built to last. They come with a low-price guarantee, so you don’t have to break the bank to elevate your daily driver.
On top of that, our warehouses are strategically located across the US. Order a new LED light bar now, and we’ll deliver your product straight to your doorstep in as fast as two business days.
Shop for a new LED light bar now and take advantage of our unbeatable deals.
Products Mentioned in this Guide
Any information provided on this Website is for informational purposes only and is not intended to replace consultation with a professional mechanic. The accuracy and timeliness of the information may change from the time of publication.


 LED Light Bar
 LED Offroad Light


