But how exactly are fuel pumps installed, and what should you look out for before doing so?
How to Install a Fuel Pump
Fuel pump installation is a complex and lengthy process. Therefore, it’s strongly recommended to hire a professional to install or replace this component.
If you’re interested in learning what mechanics do when installing a fuel pump, here’s a simplified overview of what the process might involve:
First, you need to have a reason to replace the fuel pump, which would include a no-start, a noisy pump, etc.
Secondly, if you have a no start problem and you’re in a quiet place, switch the key on without starting the engine and listen for the fuel pump to run for a couple of seconds.
If you hear the pump running, the next step would be to check the pressure, and if the pressure is good, check fuel quality, particularly if you just bought fuel.
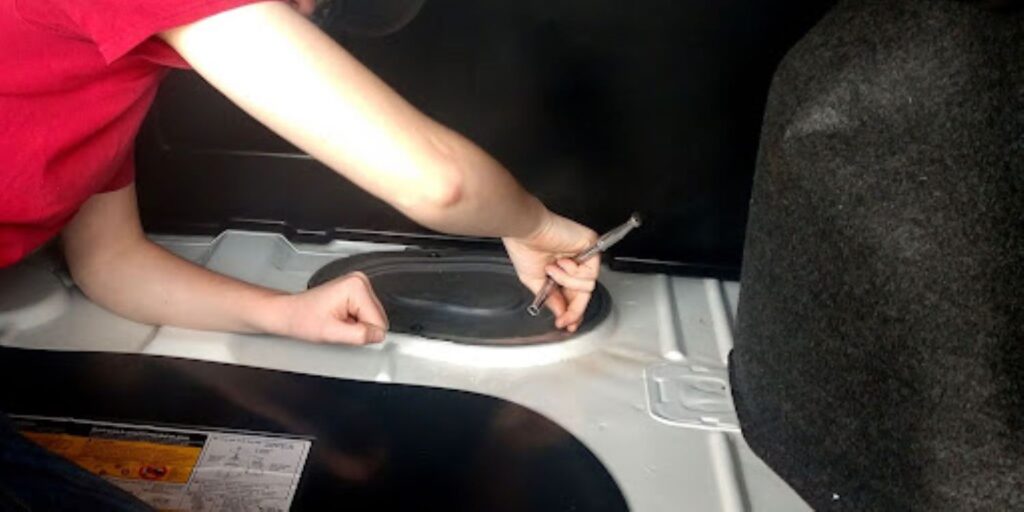
Okay, let’s say you’ve determined that your fuel pump needs replacing and you’ve decided to try doing it yourself. Check YouTube or a manual. Some fuel pumps on vehicles have an access plate either in the trunk or under the back seat. Others do not.
Pro Tips are nuggets of information direct from ASE-certified automobile technicians working with CarParts.com, which may include unique, personal insights based on their years of experience working in the automotive industry. These can help you make more informed decisions about your car.
Pro Tip: Crown Victorias have the fuel pump on the front side of the fuel tank so that it can be replaced without removing the tank.
Let’s look at some sensible procedures.
- The vehicle should be parked on a flat surface far away from traffic. The garage is the perfect place for this, as is an empty parking lot or even a nice level driveway.
- The mechanic listens for the pump when the key is switched on and then checks the fuel pump wiring if the pump doesn’t run. If the pump does run, the mechanic will check fuel pressure to see if it is up to specs and then will check fuel quality and for possible water in the fuel tank.
- The fuel pump relay and wiring will be carefully checked. Replacements or repairs will be made as necessary. After the repairs, the mechanic will retest, and if the vehicle operates normally, his work is done. But he might want to sell you a tune up, and a fuel filter replacement is a good idea if it hasn’t been done in a while.
- The mechanic relieves the fuel system pressure and disconnects the negative battery cable. Of course, if the fuel pump hasn’t been running, there won’t be any pressure.
- The mechanic siphons fuel from the tank if there is a lot of fuel in the tank (this requires special procedures on some vehicles that have anti-siphon nets in the filler tube) and disconnects the filler tube hose, the EVAP system connections (all of them), and the wires and fuel line connections from the pump.
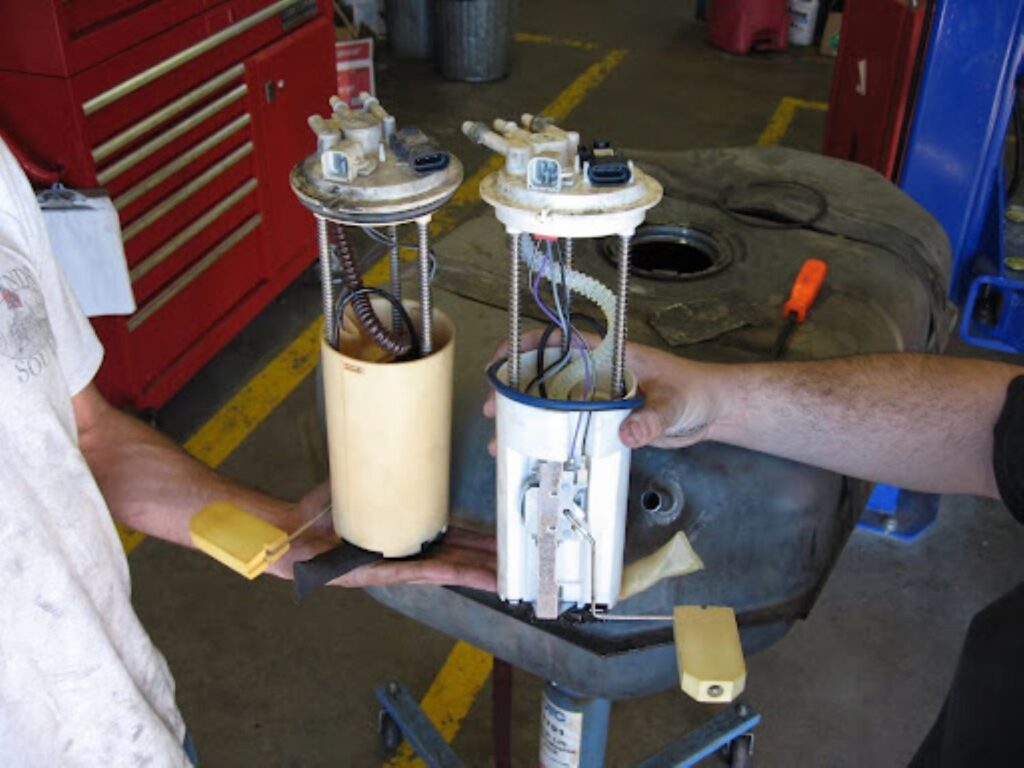
- The tank is lowered and the fuel lines are disconnected so that the fuel pump can be removed. The new pump is installed with a new gasket or o-ring.
- The fuel tank and fuel pump are reinstalled and everything that was disconnected is reconnected.
- The mechanic reconnects the negative battery cable and the tank is filled with good gas. The vehicle is then tested to see if the new fuel pump works as intended.
You need to have a reason to replace the fuel pump, which would include a no-start, a noisy pump, etc. If your vehicle has a no start problem and you’re in a quiet place, switch the key on without starting the engine and listen for the fuel pump to run for a couple of seconds. If you hear the pump running, the next step would be to check the pressure, and if the pressure is good, check fuel quality, particularly if you just bought fuel.
–Richard McCuistian, ASE Certified Master Automobile Technician
Common Mistakes to Look Out For When Installing a Fuel Pump
When installing a fuel pump, make sure that the fuel tank gasket fits and that the fuel pump is wired properly. Avoid letting any debris and other contaminants get inside the fuel tank. Last but not least, don’t forget to replace the fuel filter when replacing the pump.
Getting the Wrong Fuel Tank Gasket
Fuel tank gaskets aren’t “one size fits all”. Any product that claims to fit all sizes and works universally with any machine is bound to be worthless. Only use gaskets specifically designed for your vehicle’s fuel pump.
This prevents air and other contaminants from getting into the fuel system. Replacement fuel tanks typically come with compatible gaskets, but it doesn’t hurt to be extra cautious.
Incorrectly Wiring the Fuel Pump
Wiring the fuel pump can become tricky if the connectors are worn or corroded. A damaged connector can make the pump slower and more likely to break down.
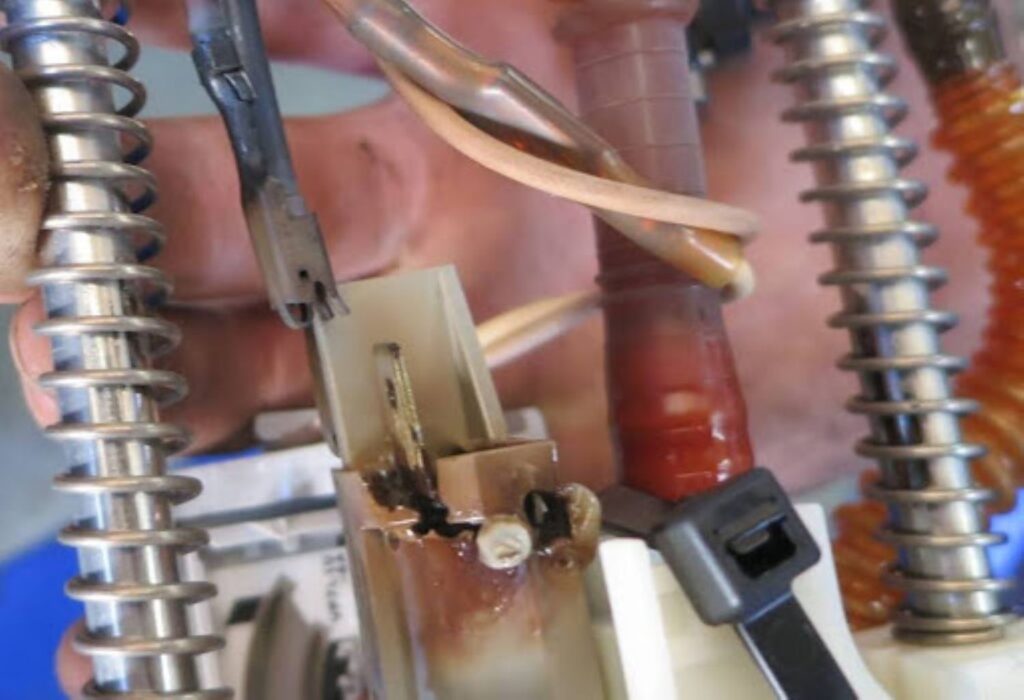
Rewiring the connector and replacing it with a new one should do the trick, but incorrectly wiring the connector may lead to more problems. To save you time and trouble, it’s better to hire a professional to do this for you.
Getting the Wrong Pump – Always Compare!
Letting Debris Contaminate the Fuel Tank
There are cases where contaminants can enter the fuel tank during fuel pump replacement. Gunk typically builds up along the outside of the old fuel pump. If the fuel tank gets contaminated, the new fuel pump will clog up faster and you’ll likely have to replace it sooner rather than later.
The gunk will typically be worse on vehicles that are being fixed after sitting for a long time. Rust and other debris can gather in the tank over time and you need to see if the tank needs cleaning before installing the new pump. If it does, then clean it.
Pro Tips are nuggets of information direct from ASE-certified automobile technicians working with CarParts.com, which may include unique, personal insights based on their years of experience working in the automotive industry. These can help you make more informed decisions about your car.
Pro Tip: If the fuel pump sock is knocked off while the pump is being installed, any tiny piece of debris will stop the pump as soon as it is drawn into the pump’s unprotected intake port.
Failing to Replace the Fuel Filter
Clogged fuel filters force fuel pumps to work harder. If you want to make sure your new fuel pump withstands the test of time, it’s important to replace the fuel filter as well. If the fuel filter hasn’t been replaced in a while, it needs doing anyway.
What Happens If You Don’t Install a Fuel Pump Correctly?
Failing to install a fuel pump correctly may negatively impact engine performance because fuel delivery plays a key role in keeping your vehicle on the road.
As fuel supply and efficiency decline, engine power will decrease and your vehicle may experience other problems such as rough running.
Make sure your fuel pump is installed correctly if you want to avoid damaging the engine.
How to Install a Fuel Pump Relay
Fuel pump relays are typically replaced when they produce strange noises or when starting problems are linked back to them.
It’s best to hire a professional to install a fuel pump relay on your vehicle.
Here’s a simplified guide if you’re curious about how a fuel pump relay replacement is done:
- Your vehicle is parked on a flat surface far away from traffic
- Manual vehicles are shifted to first gear. For automatic vehicles, the transmission is put in park.
- Wheel chocks are placed around your vehicle’s tires to prevent them from moving.
- The parking brake is engaged to keep the rear wheels still.
- The battery is disconnected from your vehicle. The ground line is removed from the negative post. This disables the fuel pump and sending unit, allowing the mechanic to remove it with ease.
- The fuel pump relay is removed from the fuse box.
- A new fuel pump relay is installed.
How Long Does it Take to Install a Fuel Pump?
On average, it takes a mechanic approximately two to four hours to install a fuel pump. However, several factors may affect how long installation takes for your vehicle.
For example, some vehicles have access points for the fuel pump whereas others require you to remove other components first. This can increase the time it takes to remove or install one since components will have to be unbolted.
How Much Does it Cost to Install a Fuel Pump?
A fuel pump typically costs between $75 and $250. The price varies depending on the make and model of your vehicle. Labor costs may set you back another $400 to $600, but it’s less if you hire an amateur, usually.
Keep Reading: Related Posts


Any information provided on this Website is for informational purposes only and is not intended to replace consultation with a professional mechanic. The accuracy and timeliness of the information may change from the time of publication.