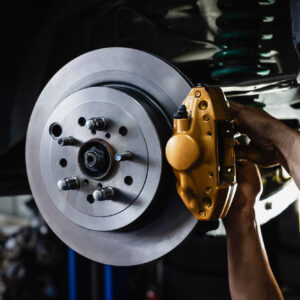
Whether you’re traveling short or long distances, it’s important to make sure that your air brakes are in top condition before heading out. That way, you can confidently pass steep hills and slippery roads. You’ll have to inspect and adjust your air brake system before and after every trip.
How Do You Adjust Air Brakes Properly?
The exact procedure of air brake adjustment can vary depending on the type and size of the brake chamber, so be sure to study your vehicle’s air brake system first. Here are some tips you can try on an S-cam brake system:
Prepare the Necessary Tools
You’ll need a wrench, a chalk or marker, and a flashlight to adjust your vehicle’s air brakes by yourself. You’ll be crawling under the vehicle, so it’s best to wear work clothes that you don’t mind getting dirty. Safety glasses and a bump cap can also come in handy.
Use Wheel Chocks
Before adjusting the air brakes, you’ll have to secure your vehicle first. Use wheel chocks to prevent your car from moving. Leave it in low gear before shutting off the engine.
Check the Air Pressure
Check the air pressure gauge on your instrument panel. This gauge lets you know how much air pressure is in the air brake system. Pump the air pressure until it reaches 90 to 100 psi before releasing the parking brakes.
Place a Mark on the Pushrod
Use a chalk or pen to mark exactly where the pushrod exits the brake chamber, and try to be as precise as possible. This will make it easier to check the pushrod travel.
Measure the Slack
You can pull the pushrod out of the brake chamber by hand, or you can use a pry bar for a more secure hold. Now you can measure the distance between the mark you wrote and the face of the brake chamber. For a type 30 standard stroke brake chamber, the slack shouldn’t measure more than three-fourths of an inch. If it does, then you need to adjust your brakes.
In some vehicles, the pushrods have a red marking to indicate when a brake adjustment is necessary. When this red marking is visible, this means you need to adjust the brakes immediately.
Disengage the Locking Device With a Wrench
Manual slack adjusters are usually equipped with an external locking device that you have to disengage to get to the adjusting bolt. Use a wrench to disconnect the lock without damaging it.
Make Sure You’re Turning the Bolt Correctly
When turning the adjustment bolt, double-check to make sure you’re turning it in the right direction. Keep an eye on the slack adjuster and pushrod. If turning the bolt clockwise is causing the slack adjuster to pull the pushrod out of the brake chamber, this means you’re turning it in the wrong direction. Turn it counter-clockwise instead.
Check the Other Brake Components
While you’re down there, it’s a good idea to check the other parts of the brake system as well. Inspect the S-cam bushing, spline, and slack adjuster for any damage or signs of wear.
Measure the Stroke Again
After turning the bolt and securing the locking device, be sure to measure the pushrod travel again. A successful brake adjustment should result in a measurement of half an inch.
How To Adjust Self-Adjusting Air Brakes
An automatic slack adjuster will reset itself, eliminating the need for a manual adjustment. In some cases, however, excessive pushrod travel can still occur and will require help from a professional. Because of this, you still need to check your brakes before every trip. Most manufacturers also recommend bringing your car to a mechanic every 25,000 to 50,000 miles for a brake system inspection.
In an emergency, however, you can still try to adjust your brakes by yourself. This involves pressing the brakes hard and releasing them completely, six times. Repeated brake applications should trigger the automatic slack adjuster to fix itself. If the pushrod stroke still exceeds three-fourths of an inch, then you’ll need to stop driving and ask a qualified mechanic for help.
What Is an Air Brake System?
In an air brake system, compressed air is used to apply pressure on the brake pads, forcing the vehicle to stop. You can typically find air brakes on heavy-duty vehicles, such as buses, trucks, and trailers.
How Do Air Brakes Work?
When you press the brake pedal, compressed air flows from the reservoir tank into the brake chamber or brake calipers. The air pressure is then converted into a mechanical force that pushes the brake shoes against the brake drums or rotors. This friction slows down the vehicle until it stops completely.
Why Is Air Brake Adjustment Important?
The key to preventing brake failure is routine brake maintenance, which includes inspecting your brakes and adjusting them when necessary. If your air brakes aren’t adjusted properly, the entire brake system can fail. You won’t be able to stop your vehicle in time, putting you at risk of getting into an accident.
How Often Should You Adjust the Air Brakes?
A vehicle’s brakes will gradually wear over time, causing brake pushrod stroke to increase as well. When the brake pushrod stroke exceeds the adjustment limit, this means the brake is out of adjustment and can suddenly fail. Because of this, it’s best to inspect the pushrod stroke every day before driving.
In some areas, you’ll notice signs warning you about steep downhill slopes. Before proceeding, you’re required by law to stop at a nearby shoulder or pullout area to check your brakes.
Any information provided on this Website is for informational purposes only and is not intended to replace consultation with a professional mechanic. The accuracy and timeliness of the information may change from the time of publication.


