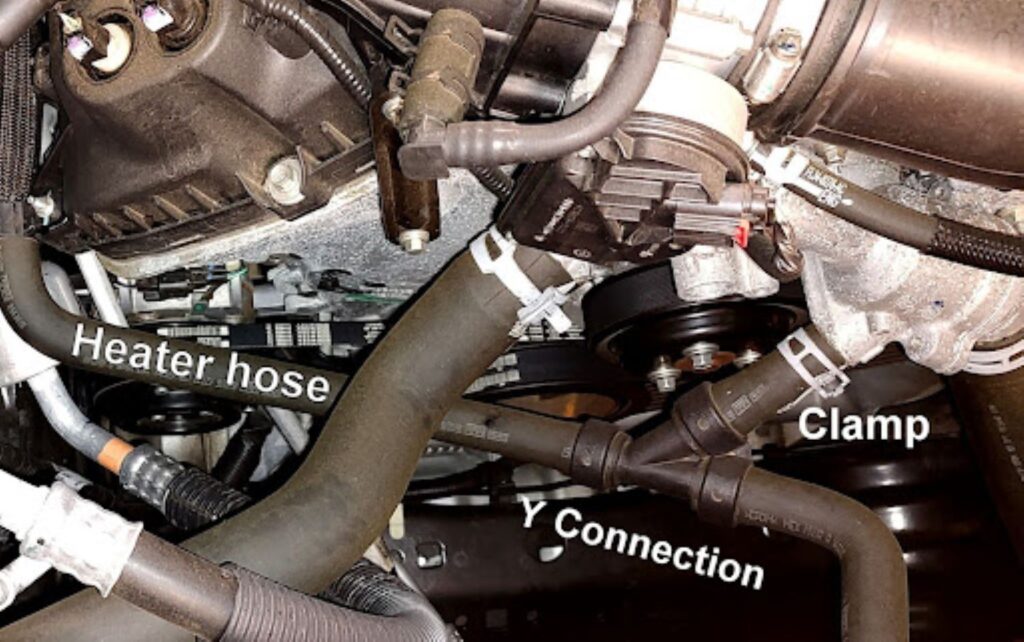
Made of thick, durable rubber, heater hoses are designed to last. However, constant exposure to the engine’s heat can cause them to turn hard and brittle over time, and any oil that leaks on a heater hose can cause it to swell and become soft and weak.
Caution: Don’t ever open a hot cooling system. Always let it cool so there is no pressure to prevent serious burns.
How To Replace a Heater Hose
Depending on where the heater hose connections are, replacing a heater hose may be very simple or it may be dreadfully difficult. Here are a few tips to consider when replacing a heater hose:
Let the Engine Cool Down
Let your engine cool down before working on it. It’s best to do the work when the engine is completely cold, after it has been sitting for hours.
Locate the Heater Hoses

Remove the Hose Clamp
Use a pair of pliers to remove the hose clamps securing the hoses. If your vehicle’s heater hose comes with a spring-loaded hose clamp, you might need a special removal tool. If your vehicle’s heater hose has worm screw clamps, use a screwdriver to remove these.
Note that some heater hoses won’t have clamped connections and may require the exact hose to be purchased for the vehicle and engine.
Note that some heater hoses won’t have clamped connections and may require the exact hose to be purchased for the vehicle and engine.
–Richard McCuistian, ASE Certified Master Automobile Technician

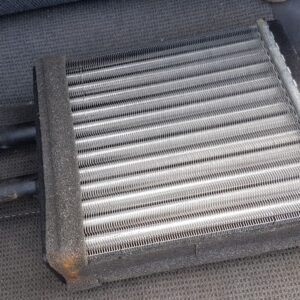
One of the heater core connections has a restrictor in it and if you connect the inlet hose to the outlet heater core pipe, coolant flow from the water pump can build pressure in the heater core and cause it to burst. This vehicle has “out” by one of the heater core connections for that reason. The other tube has a restrictor in it. | Image Source: Richard McCuistian
Cut the Heater Hose
When cutting the heater hose, use an X-Acto knife for a nice, clean cut along the hose. You can also use a razor blade if you don’t have a knife.

Remove the Heater Hose
To remove the heater hose, you’ll have to disconnect both ends from the heater core and the engine. You can usually find the heater hose mounted near the engine water pump, but its exact location can still vary depending on your vehicle’s year, make, and model.

Once you’ve located both ends, be extra careful when removing it from the heater core and engine. You don’t want to damage these parts and accidentally cause a coolant leak.
Remove the Mounting Hardware
Some vehicles come with mounting brackets that secure the heater hoses to keep the engine compartment nice and neat. Be sure to first remove any mounting hardware that’s in the way, so you don’t end up forcefully yanking the hoses from the engine.
Clean the Hose Fittings
Once you’ve successfully removed the heater hoses, don’t forget to clean the fittings before installing the new hoses. You can use a shop towel to wipe down any dirt or debris on the fittings.
Compare the Old and New Hoses
Before installing the new hoses, compare them with the old ones first. They don’t have to be exactly the same, but they should mostly match up. That way, you can be sure they’ll fit.
Install the New Heater Hose
When installing your new heater hoses, don’t forget to secure them using new hose clamps Most people recommend using new hose clamps when installing new heater hoses to make sure they’re both in top condition.
Some hose clamps need a special tool to activate the clamp, so be sure to read the instructions on the packaging carefully. Some heater cores connections are deep under the cowl and behind the engine and you may have issues verifying that the hoses are properly connected.
Check for Coolant Leaks
Once you’ve topped off your cooling system, you can now safely drive your vehicle. Go on a test drive first and check for any coolant leaks. This way, you can be 100% sure that you installed your new heater hose correctly.

What Does a Heater Hose Do?
Connected to the heater core and engine, automotive heater hoses are rubber hoses that circulate coolant through the heater core to keep the cabin warm. You can find the heater core inside the vehicle’s dashboard on most vehicles, so the heater hoses typically extend from the engine to the firewall.
Heater core hoses are a crucial part of your vehicle’s heating system, and they work hand in hand with the cooling system. After the coolant absorbs excess heat from the engine, it flows to the heater core through the heater hose. From there, heater fans blow through the core to warm the cabin. This also cools down the coolant, which the hoses send back to the cooling system.
How Much Does a Heater Hose Replacement Cost?
In general, you can expect to spend anywhere from $480 to $510 if you hire a mechanic to replace your heater hose. You can save money by replacing it yourself, but the final price of heater hoses will still vary depending on several factors, including your vehicle’s year, make, and model. On average, however, heater hoses can cost anywhere from $10 to $740.
Get OE-Grade Heater Hoses For Your Vehicle Online
Heater hoses can become brittle and develop leaks over time. While your hose might not be leaking yet, it might be best to replace it if it’s already old. A leaking heater hose can quickly deplete your coolant levels, which can result in overheating and significant engine damage. Luckily, CarParts.com can make searching for a replacement heater hose easy.
CarParts.com lets you shop for the right heater hose easily, thanks to our vehicle selector. Simply enter your vehicle’s year, make, and model to see a list of compatible hoses. Our selection includes thousands of products from the leading manufacturers. Have questions related to our hoses and their fit? Our friendly and helpful customer support team is ready to assist you anytime.
Don’t risk driving with a faulty heater hose and order a high-quality heater hose at CarParts.com today.
Any information provided on this Website is for informational purposes only and is not intended to replace consultation with a professional mechanic. The accuracy and timeliness of the information may change from the time of publication.


