If you own a Toyota vehicle, you may eventually encounter the diagnostic trouble code (DTC) P1135, as I recently did on my 2001 Tacoma. Even though it’s always a bummer when the Check Engine Light comes on, the good news is, the fix for this code is usually relatively cheap and easy.
What the P1135 Code Means on a Toyota Vehicle

Unlike generic OBD-II codes, which are defined by the Society of Automotive Engineers (SAE), P1135 is a manufacturer-specific code. That means the code is defined by Toyota.
P1135 stands for A/F Sensor Heater Circuit (Bank 1, Sensor 1). The code indicates that the engine control module (ECM) has detected a problem with the air-fuel ratio sensor 1 heater circuit on bank 1.

What is an A/F Ratio Sensor?
Alright, that’s great. But what is air-fuel ratio sensor 1, and what is bank 1? Let me explain.
An air-fuel ratio sensor (also called a wideband oxygen sensor) is an advanced type of oxygen (O2) sensor. Like a traditional O2 sensor, an air-fuel (A/F) ratio sensor measures the amount of oxygen (or more accurately, the amount of combustibles) in the exhaust stream. The ECM primarily uses data from the sensor when calculating how much fuel to give the engine.
But while a traditional, narrowband O2 sensor cannot detect the exact air-fuel ratio, an A/F sensor can do so under most circumstances.
The output signal from the two types of sensors is also different. A traditional O2 sensor produces a voltage signal that switches back and forth between a lean (lower voltage) and rich (higher voltage) signal, whereas an A/F sensor produces a variable current signal that gradually increases.
Both types of sensors require a heating element to get them up to operating temperature. The heating element, which is located inside the sensor, is controlled by the ECM.
Modern vehicles come with either three-wire or four-wire O2 sensors. The A/F sensor in our sample Toyota Tacoma is a four-wire sensor. Two of the wires are for the oxygen sensor itself and the other two are for the heater circuit.
What Does Bank 1, Sensor 1 Mean?
The bank 1 portion of the code indicates that the issue is with the A/F sensor on the side of the engine that houses the number 1 cylinder. In most cases, this terminology only applies to engines with a ‘V” or flat configuration and two sets of oxygen sensors.
As for the sensor 1 portion of the code, it refers to the sensor before the catalytic converter. Sensor 2, on the other hand, would be the sensor after the converter.
Troubleshooting Code P1135 on a Toyota Tacoma
Fortunately, troubleshooting code P1135 is usually pretty straightforward. On my Tacoma, the Bank 1, Sensor 1 A/F sensor heater gets power from the electronic fuel injection (EFI) relay. The ECM controls the heater by grounding and ungrounding the circuit.
Note: The following information is for educational and entertainment purposes only. Have your vehicle diagnosed and repaired by a professional if you are uncertain about your automotive repair skills.
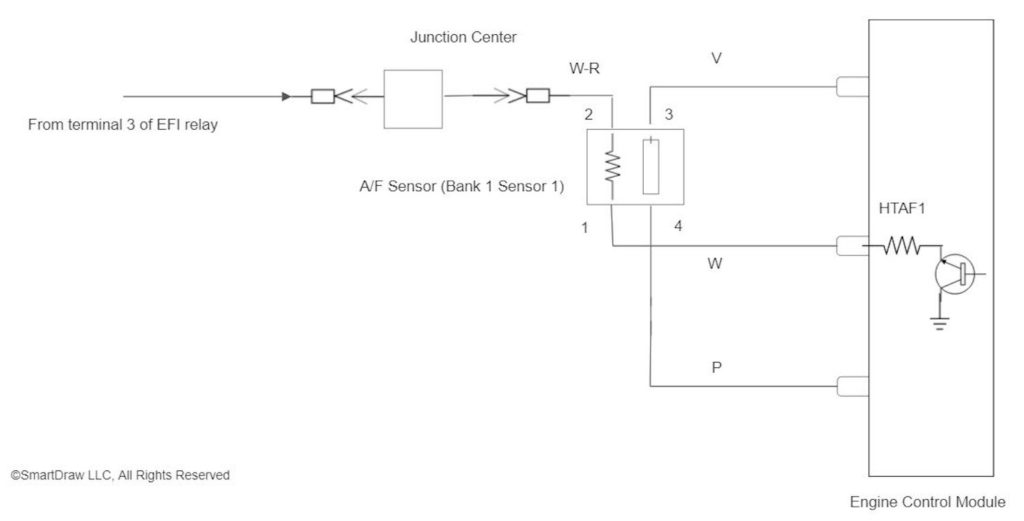
Although the sensor has four wires going to it, we’re only concerned with the two going to the heater element at connector pins one and two. The wires are white (W) and white and red (W-R) on the harness side of the connector. On the sensor side of the connector, the wires are both black.
Spoiler alert: On my Tacoma, I found the cause of code P1135 to be a failed A/F sensor. But there are other potential reasons the code might set, as well. The list of common causes includes:
- A failed A/F sensor (due to a faulty internal heater element)
- An issue with the power side of the circuit
- An issue with the ground (control) side of the circuit
Because, most of the time, the issue is a faulty A/F sensor, I began my troubleshooting there.
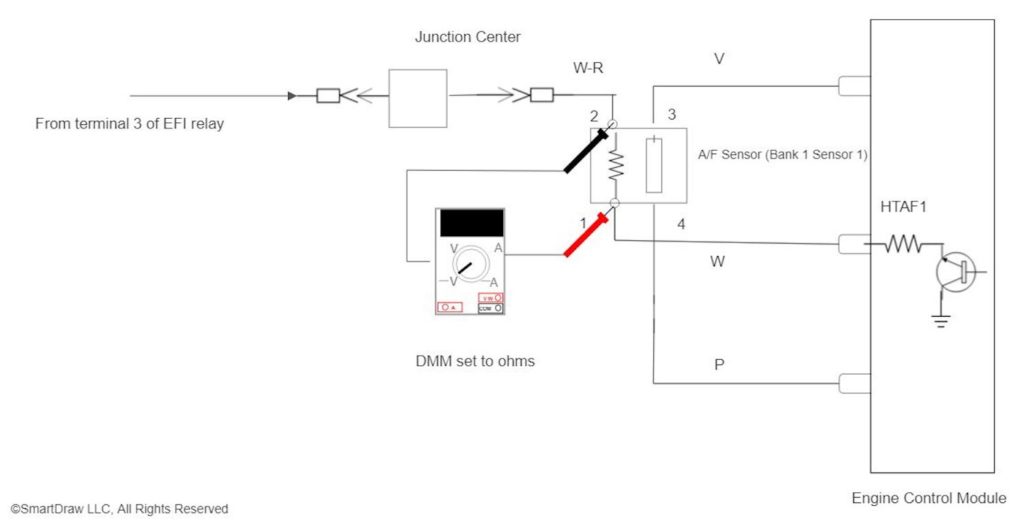
To diagnose code P1135 on my Tacoma, I did the following:
Warning: Make sure the engine and exhaust system are cool before doing any diagnostic work on the A/F sensor.
Note: The ignition switch should be in the OFF position while performing this test.
1. Set my digital multimeter (DMM) to the ohms setting.
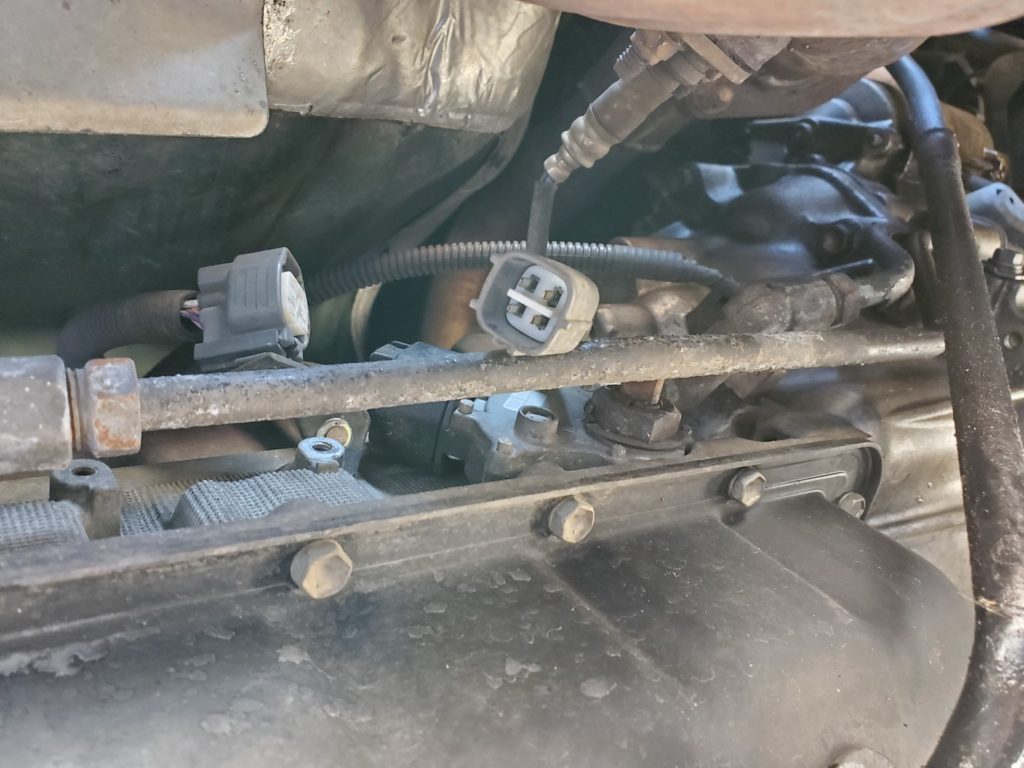
2. Disconnected the A/F sensor electrical connector.
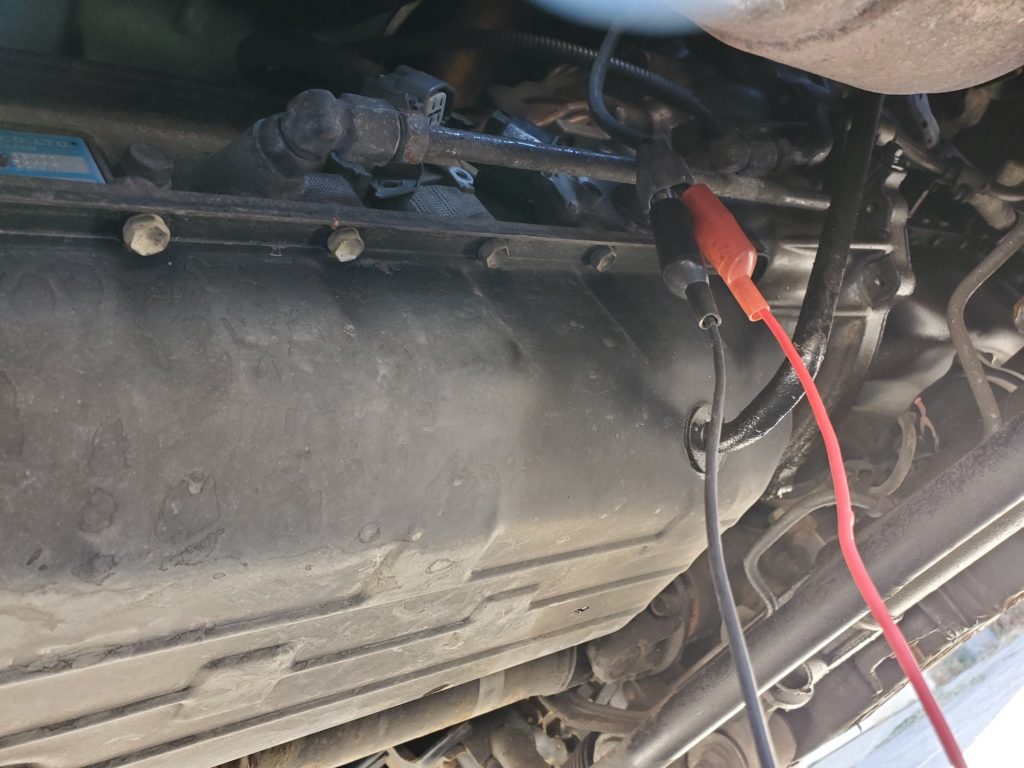
3. Connected my DMM meter leads to the heater circuit terminals (the black wires) on the sensor side of the electrical connector.
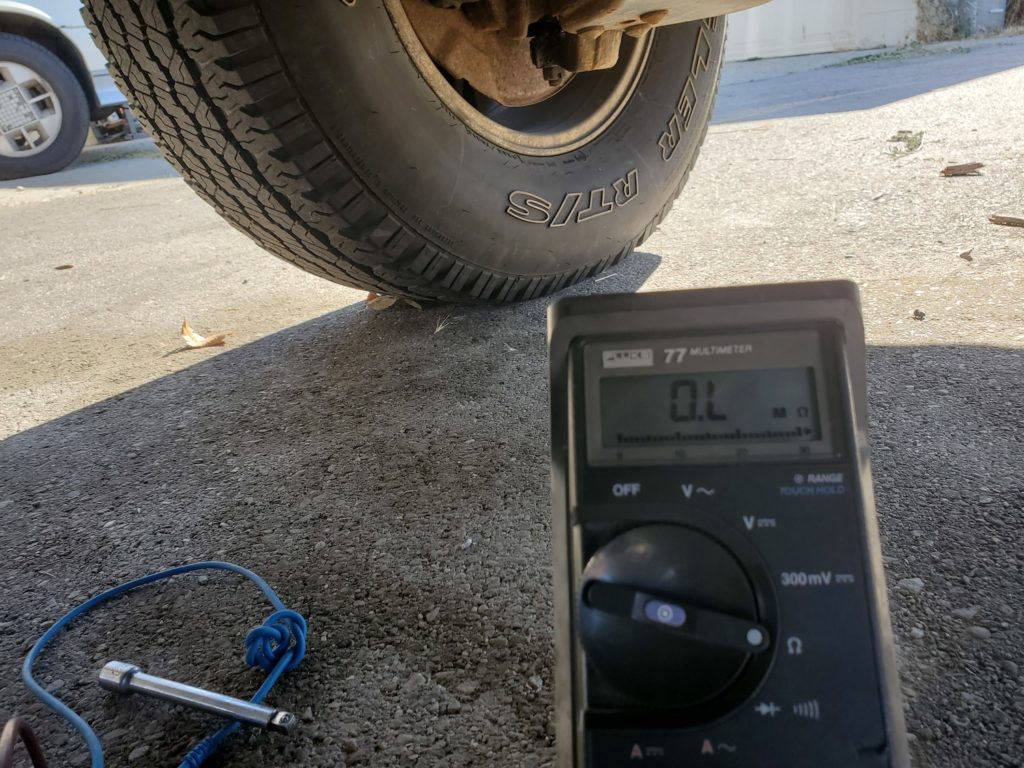
4. Checked the reading on my meter. On my truck, the reading was over limit (OL), indicating an open heater circuit and a bad sensor.
Note: According to the repair information from Toyota, the resistance specifications for the heater circuits are 0.8 to 1.4 ohms at 68 degrees and 1.8 to 3.2 ohms at 1400 degrees. A reading that falls outside of that range indicates the heater circuit inside the A/F sensor is faulty, and the sensor should be replaced.
It’s important to note that, while code P1135 ended up being a bad sensor on my truck, that isn’t always the case. While replacing a faulty sensor is the most common fix for the code, the necessary repairs may differ on your vehicle.
Fixing Code P1135 on a Toyota Tacoma
On my Tacoma, the fix for code P1135 ended up being a new A/F sensor. Fortunately, replacing the sensor on this truck is pretty easy, as long as there isn’t a lot of rust and corrosion.
How to Replace an A/F Sensor
The tools needed to replace an A/F sensor will vary, depending on what type of car you have. But on a 2001 Toyota Tacoma with a 3.4L V6 engine and an automatic transmission, you’ll need:
- 12mm wrench (I used a ratcheting wrench with a flexible head)
- Gasket scraper
- Penetrating oil
- Safety glasses
- Scan tool or code reader (recommended)
Air-fuel Ratio Sensor (Wide-Band Oxygen Sensor) Removal
Before you attempt to remove the A/F sensor, it’s a good idea to spray the retaining nuts with penetrating oil the night before. Exhaust components can get extremely rusty, and the sensor’s studs can break off.
Warning: Make sure the engine and exhaust system are cool before proceeding.
1. Put on your safety glasses.
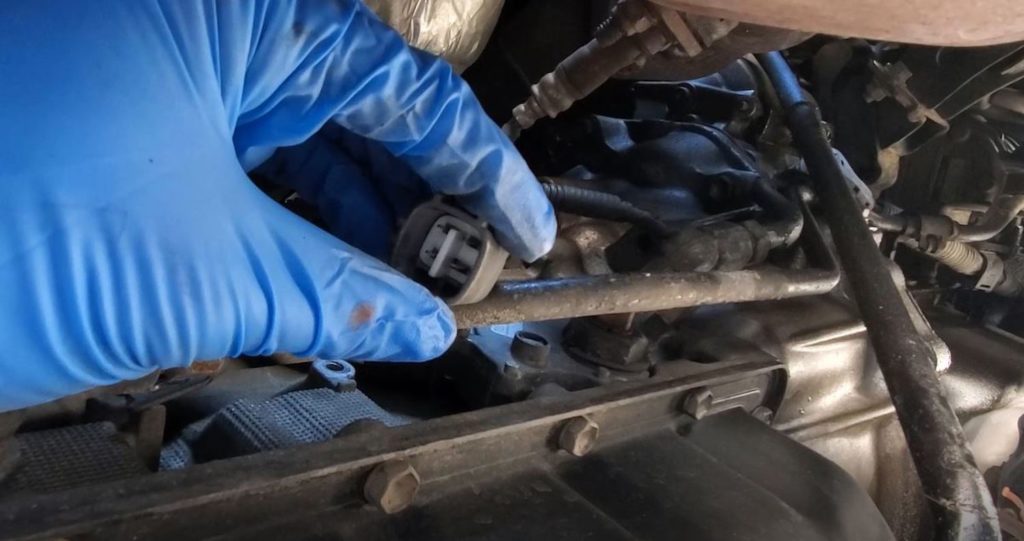
2. Disconnect the A/F sensor electrical connector by pressing down on its tab and pulling both sides of the connector apart.
Tip: You may want to remove the 10mm bolt holding the connector mounting bracket to get a better grip on the connector.
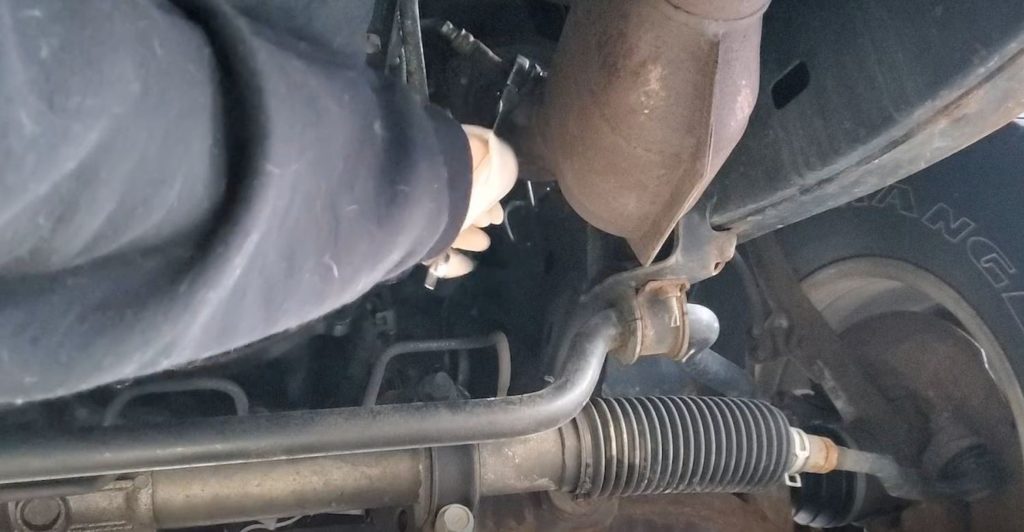
3. Use a 12mm wrench to remove the two A/F sensor retaining nuts.

4. Remove the sensor from the vehicle.
5. Remove the old gasket from the exhaust. If necessary, you can carefully use a gasket scraper to remove the old gasket material.
Comparing the Resistance Values of the Old Sensor to the New Sensor
For demonstration purposes, I decided to compare the old sensor’s heater resistance values to that of the new sensor. I performed a bench test to compare the values.
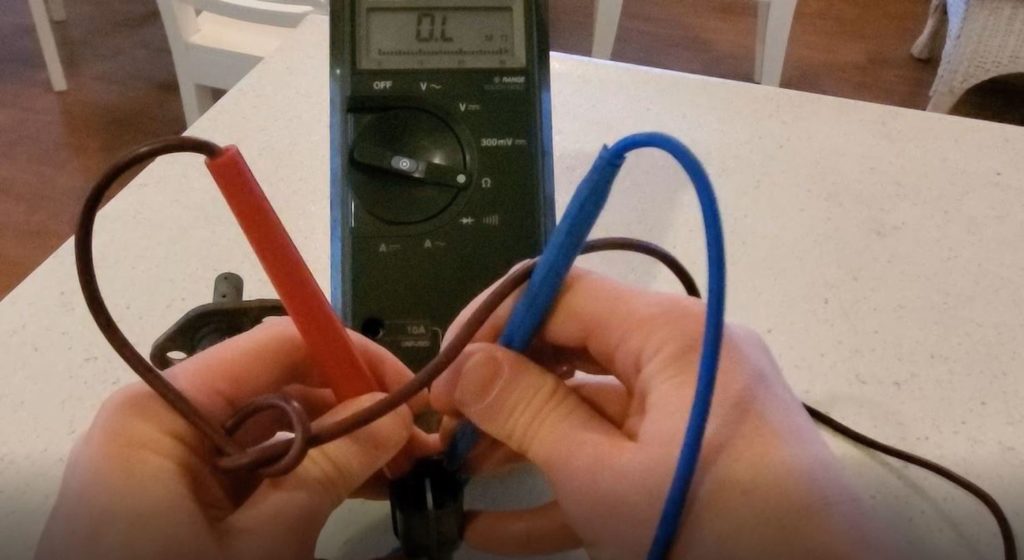
As you can see in the image above, the old sensor measured “OL” indicating an open circuit.
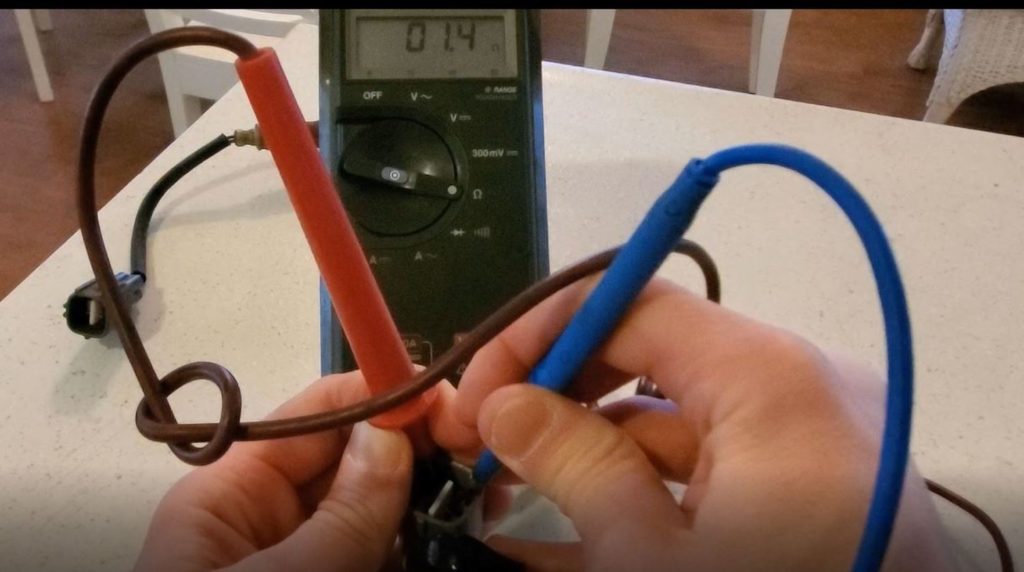
Meanwhile, the new sensor measured 1.4 ohms, which is within specification, according to the information from Toyota.
Air-fuel Ratio Sensor (Wide-Band Oxygen Sensor) Installation
- Compare the new sensor to the old sensor to ensure that both are the same design.
- The replacement sensor should come with anti-seize applied to its threads. If not, apply a small amount of anti-seize compound to the threads at this time.
- Mount the new gasket in place.
- Insert the new sensor into the exhaust.
- Use a wrench to tighten down the sensor’s retaining nuts.
Note: Be careful not to overtighten the nuts. - Reinstall the sensor’s electrical connector.
- Use a scan tool or code reader to erase code P1135 from the ECM’s memory.
Note: If you do not manually clear the code, it will take the ECM a while to clear it. Typically, a heater circuit code will take forty warm up cycles to clear on its own.
Verifying the Fix for Code P1135
At this point, I feel pretty confident that code P1135 has been properly diagnosed and repaired—but we can verify the fix by checking the O2 sensor heater monitor.
You see, manually clearing the code doesn’t verify the repair. To ensure that the vehicle is fixed, we need to know that the ECM sees the problem is gone. We can do this by checking the O2 sensor heater monitor—a system self-test the ECM runs on the heater circuit.
Here’s how you check the monitor status:

1. Clear the code using a scan tool or code reader.
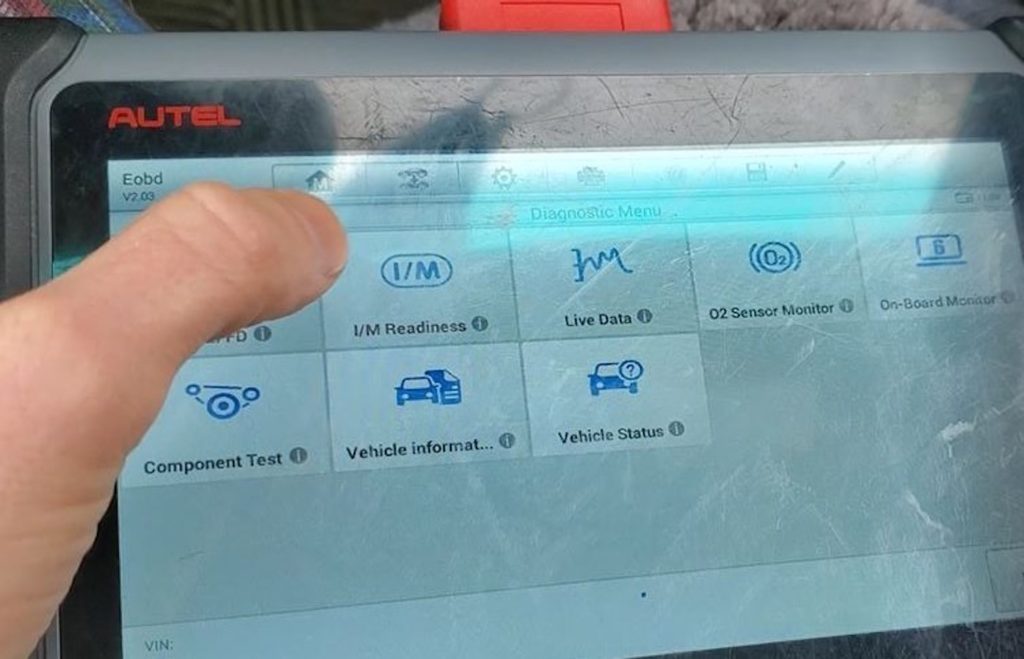
2. View the monitor test results using a capable scan tool or code reader. On my scan tool, this information is listed under “I/M Readiness” when using generic OBD-II, but your tool may say something different.
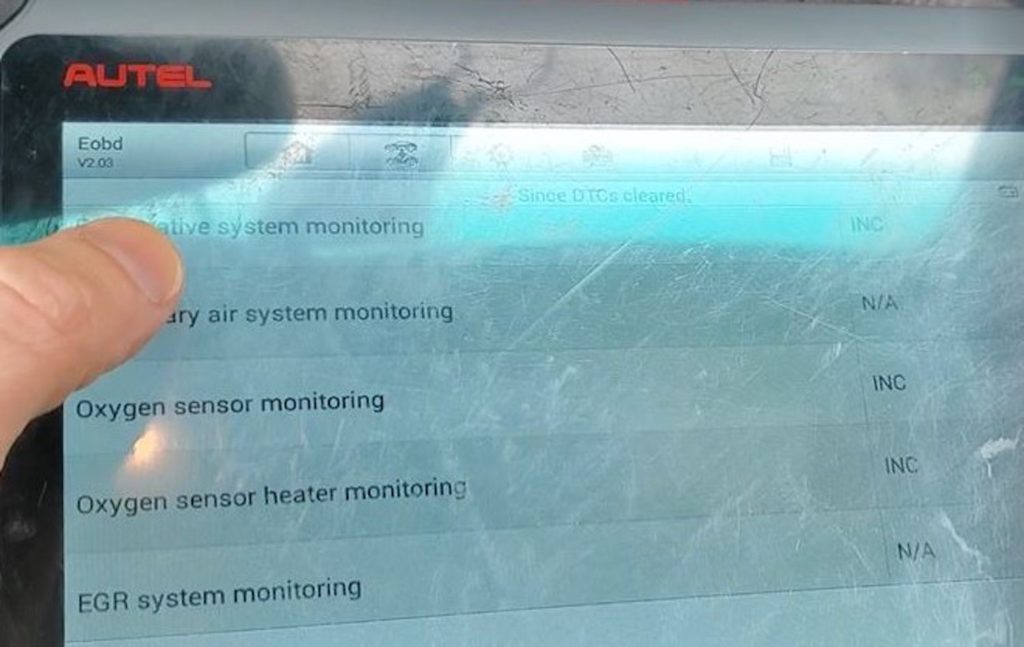
3. Scroll down until you find the O2 sensor heater monitor. You’ll notice the monitor is listed as “inconclusive” (or something similar) because the ECM has not run the heater system self-test.
4. Complete the O2 heater monitor drive pattern to force the monitor to “run”. You can find the drive pattern information via an online repair database.
According to the information I have from Toyota, to force the O2 heater monitor to run, all codes must first be cleared. You must then start the vehicle and allow it to idle for nine minutes. After that, you need to drive the truck for two minutes at speeds greater than 25 mph.
Fulfilling these requirements should force the ECM to run the O2 sensor heater self-test.
Note: If you don’t have access to the drive pattern information, you can simply drive the vehicle until the monitor status changes from “inconclusive” to “okay”.

5. Ensure that the state of the O2 sensor heater monitor changes from “inconclusive” to “OK” (or something similar).
This means the ECM recognizes the O2 sensor’s heater is working properly, and the truck is fixed. Yay!
Finding an A/F Sensor for Your Vehicle
An air-fuel sensor ratio sensor (A/F sensor) is an advanced type of oxygen sensor. Like a traditional oxygen sensor, it measures oxygen content in the exhaust stream. Over time, it can fail due to several reasons. Luckily, it’s easy to find a replacement here at CarParts.com.
Why go to a brick-and-mortar auto parts store when you can shop for an A/F sensor online? Check out our easy-to-use vehicle selector, and browse the best deals on compatible parts for your vehicle.
We carefully source our products from the most reliable parts manufacturers in the industry, so you can trust that you’re shopping from the best options available.
Need help completing your order? Call our toll-free hotlines now, and one of our friendly customer service representatives will be ready to assist you.
Don’t let a bad A/F sensor keep your vehicle from running in tip-top shape. Shop online, and enjoy our best deals today.
Products Mentioned in this Guide
Any information provided on this Website is for informational purposes only and is not intended to replace consultation with a professional mechanic. The accuracy and timeliness of the information may change from the time of publication.


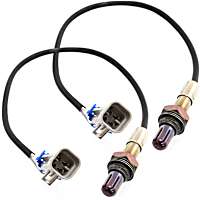 Oxygen Sensor
 Engine Control Module


👍 Thanks for the help!