Project: DynoMax Cat-Back Exhaust – Part Number 1734
Vehicle: 1999 Jeep Wrangler Sahara
Level of Difficulty: Easy
Overview
I could list off a lot of reasons why we replaced the exhaust on our Jeep; rusty stock exhaust, increased fuel efficiency, yada yada. But I’m not going to do that. I just wanted a new cat-back exhaust. Our exhaust was rusty, but not falling apart.
I tend to research things to death. In researching cat-back exhausts, I read/watched/listened to every internet review, shootout, blog, video, and audio clip I could find. I made mental notes of fit, sound, quality, and price. Sound was one of the biggest factors in my decision. I didn’t want a super loud, hear-it-blocks-away exhaust, but I did want a good note/tone. In a short vehicle with minimal interior like a Jeep, a loud, droning exhaust can get irritating very quickly. In all of my research, the DynoMax was repeatedly described as slightly louder than stock, well fitting, and high quality. When comparing prices, the DynoMax won hands down. My decision was made. (Dynomax on CarParts.com)
First Impressions
Anytime I order something online, I track it via the carrier’s website so I know exactly when my toys well thought out and economically beneficial items will arrive.
The exhaust kit was well packaged in a sturdy box with thick rolled paper. The muffler was in its own box, and the exhaust clamps in an envelope.


The finish on the muffler and exhaust pipe were top notch. The stainless exhaust tip was even covered in sticky bubble wrap to protect it during installation.
Instructions weren’t included, but there’s not much need with 4 parts.
Installaton
Tools used
- 3/8 inch drive ratchet – used for removal of the stock exhaust clamp and installation of new exhaust clamps
- 4 inch 3/8 drive extension – used for removal of stock exhaust clamp
- 16mm deepwell socket – used for removal of stock exhaust clamp
- 9/16 inch deepwell socket – used for installation of new exhaust clamps
- Slip-Joint Pliers (Channel Lok) – used for removal of stock exhaust pipe from rubber hangers
- Sawzall with metal cutting blade – may not be necessary, used to cut stock exhaust pipe behind muffler, makes removal of the stock exhaust easier
- Dremel Rotary Tool with cutting discs – may not be necessary, used to cut stock exhaust clamp Penetrating Oil (PB Blaster, Liquid Wrench, or similar) – used to loosen threads on stock exhaust clamp
Removal of Factory Exhaust
Removing the stock exhaust turned out to be the most difficult part of the project (and it wasn’t bad at all). The stock exhaust was held in by an exhaust clamp just forward of the muffler, one exhaust hanger in front of the axle, and one exhaust hanger behind the axle.
The stock exhaust winds around the spring, shock, and fuel tank, so we chose to cut the exhaust tube (with the sawzall) behind the muffler to make removal easier. This turned out to be a good idea.
Helpful Hint #1: the hangers on the stock exhaust pipe are a piece of bent steel rod with a cone on the end to hold it in the rubber hangers. Getting these out of the rubber hangers turned out to be somewhat difficult. We ended up using a pair of slip-joint pliers (Channel-Lock pliers) to remove them. Put the upper jaw (big curved end) around the rubber hanger and the bottom jaw on the end of the cone of the steel hanger. Squeeze the pliers to push the steel cone thru the rubber hanger. It may take a few tries, but this is the easiest way we could think up.


With the exhaust freed from the rubber hangers, we pulled the exhaust out of the Jeep from the rear. This took a few tries twisting the bent tube different ways to find an easy path out. Our Wrangler has a 4 inch lift, so stock height Jeeps may need to jack the rear of the frame up to let the axle droop enough to pull the old pipe out.
Helpful Hint #2: take note of how the stock exhaust is routed around other components (between shock and fuel tank, this side of e-brake cable, etc – snapping some pics with your phone will be helpful when you snake the new DynoMax exhaust pipe back thru).
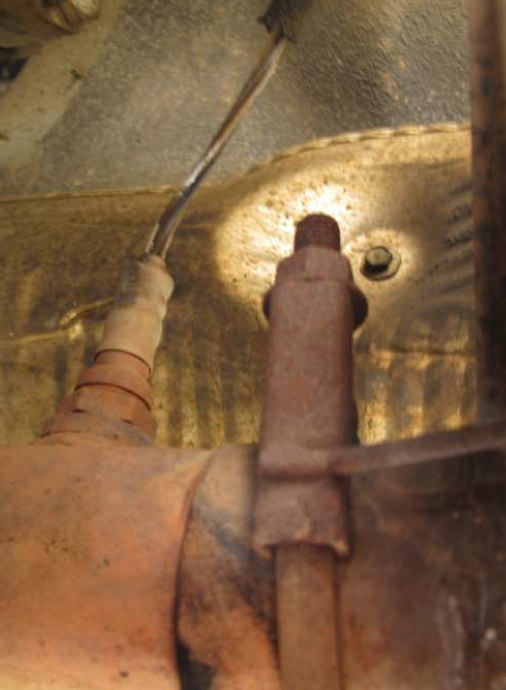
With the exhaust pipe out, the stock muffler was the only item left to remove. Chrysler chose to use a strange wrap-around exhaust clamp that proved to be far smarter than we were.

Helpful Hint #3: soak the nut on the exhaust clamp with PB Blaster or WD-40 or similar before you try to loosen it. If I were to do this again, I would start soaking the nut a day or two (2 or 3 times a day) before I planned on swapping the exhaust.
Getting to the nut required a deep well 16mm socket and 4 inch extension as the nut was pointed up toward the floor of the Jeep. You may be able to remove this with a wrench, but it will take a while. This nut put up quite a fight at first, then it strangely got very easy to turn. Then the nut and end of the clamp came off in the socket. The only method of removing what remained of the clamp that came to mind was to cut thru it with a Dremel cutoff wheel. 10 minutes later, I was victorious. With the clamp off, the muffler should easily come off, right? Not exactly, but some prying with a prybar and a few whacks with a hammer convinced it to let go.

In 2000, Chrysler switched from this style clamp to a two-bolt flange (2000-2006 Wranglers use a different part number exhaust). I suspect the reason was a high number of threatening letters regarding this clamp.
Dynomax Cat-Back Install
With the stock exhaust removed, we started by snaking the DynoMax exhaust pipe from the rear of the Jeep to where it will meet the new muffler (use the pics you took while removing the stock exhaust pipe for reference).

With the exhaust pipe routed, we attached the rear hanger to the rubber hanger. We did not attach the hanger behind the muffler to aid in aligning the exhaust pipe to the muffler.
The muffler included with this kit has one hole in the center and one offset to one side. DynoMax does not include a diagram showing what orientation to install the muffler. We chose to copy the factory orientation; center inlet – offset outlet.
We began by sliding the muffler (center inlet) onto the stock exhaust pipe in a flat orientation. We then slid the new exhaust pipe into the rear (offset outlet) of the muffler. The next step was installing the final hanger, but the steel hanger was a little ways off from the rubber hanger. Taking a step back to asses the situation, we realized that rotating the muffler 45 degrees raised the offset outlet high enough to easily slide the steel hanger on the exhaust pipe inte the rubber hanger.
Before tightening the exhaust clamps, we made sure that the exhaust pipe was rotated to have the most clearance around under-vehicle components. It was then time to tighten the exhaust clamps. Make sure you tighten the nuts on the clamps evenly. There should be roughly equal amount thread extending past the nuts. A few quick spins of our trusty 9/16 inch socket and ratchet and we were done!
The Bottom Line
Fit: The exhaust pipe has plenty of clearance around all under-vehicle components. The muffler fit very well onto the front stock exhaust pipe and the new rear exhaust pipe.
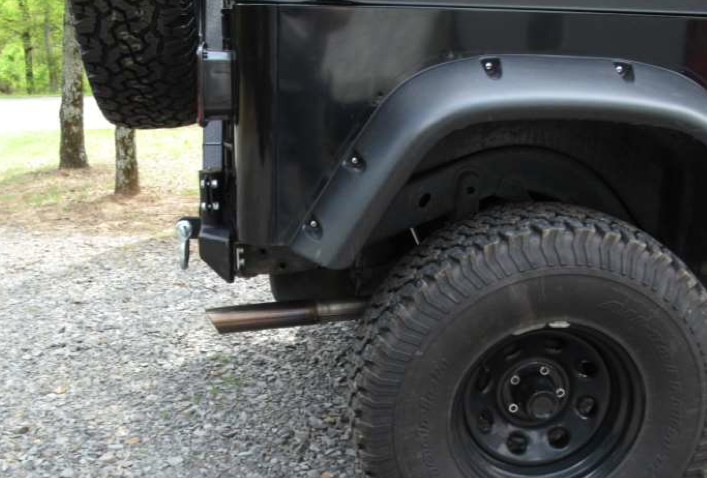
Appearance: The exhaust tip looks great: welds are clean, finish is excellent, mandrel bends in pipe result in a constant diameter (no reduction in flow).
Sound: The tone inside the vehicle is noticeable, but not droning. Volume inside (even with the top off) is a little louder than stock. At high revs, the tone is still low and barely louder than the stock exhaust (if any). Outside the vehicle at idle you can hear a nice deep tone. When loaded at low RPM you get a deep growl; especially at the rear of the Jeep.
Performance: We saw a noticeable increase in power, and our fuel economy increased slightly.
We are very pleased. DynoMax did a great job on this exhaust system.


Any information provided on this Website is for informational purposes only and is not intended to replace consultation with a professional mechanic. The accuracy and timeliness of the information may change from the time of publication.


